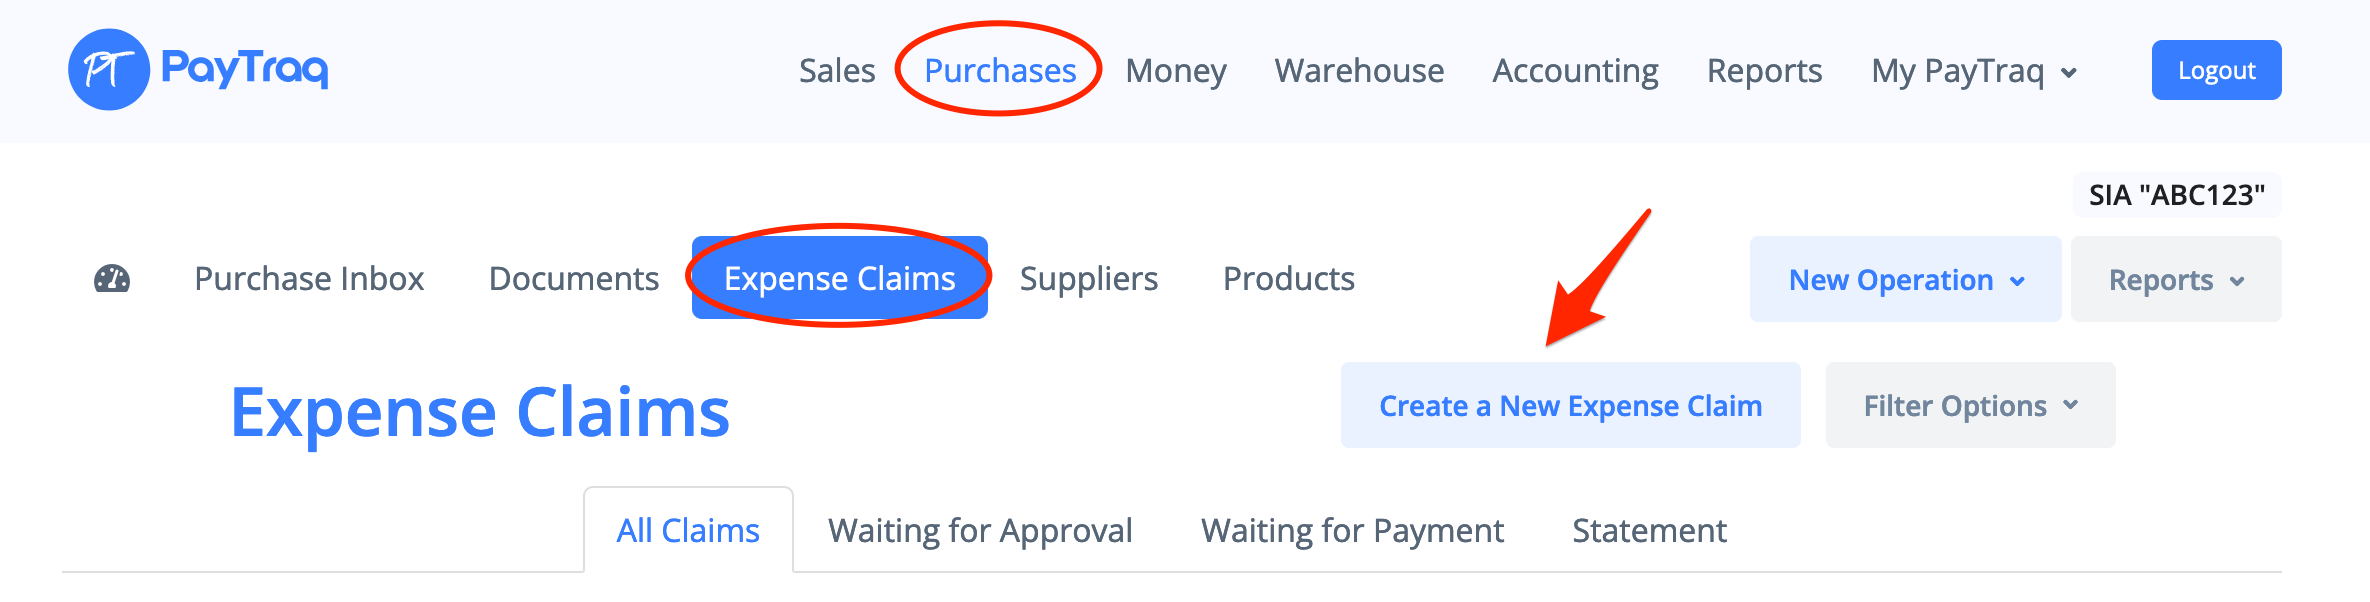
1) Select Purchases -> New Operation -> Create a New Expense Claim or go to Purchases -> Expense Claims and click on the Create a New Expense Claim button. *
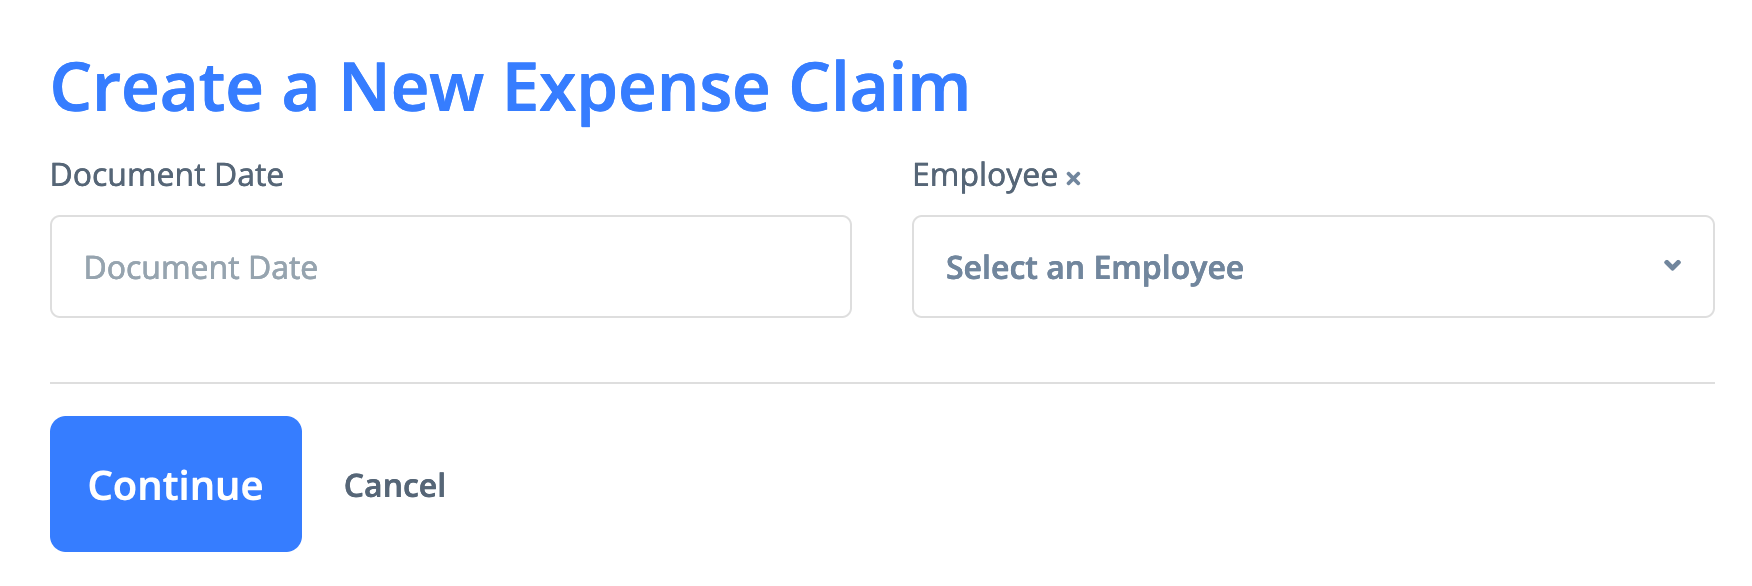
2) Enter the date of the expense claim and select the employee. If the employee is not on the list, then fill up the "Employee" field with a name and a new employee will be created (you can complete all this employee’s details later)
3) Add a new expense receipt to the list of expenses, select a supplier, enter the date and number of the receipt, fill in the expense description and the total amount with taxes. Choose a GL account and a tax key for this expense line if they differ from the default ones. If the supplier is not on the list, then fill up the "Supplier" field with a name and a new supplier will be created (you can complete all this supplier’s details later). Click "Add a New Entry" link or N button on your keyboard to create next entry.
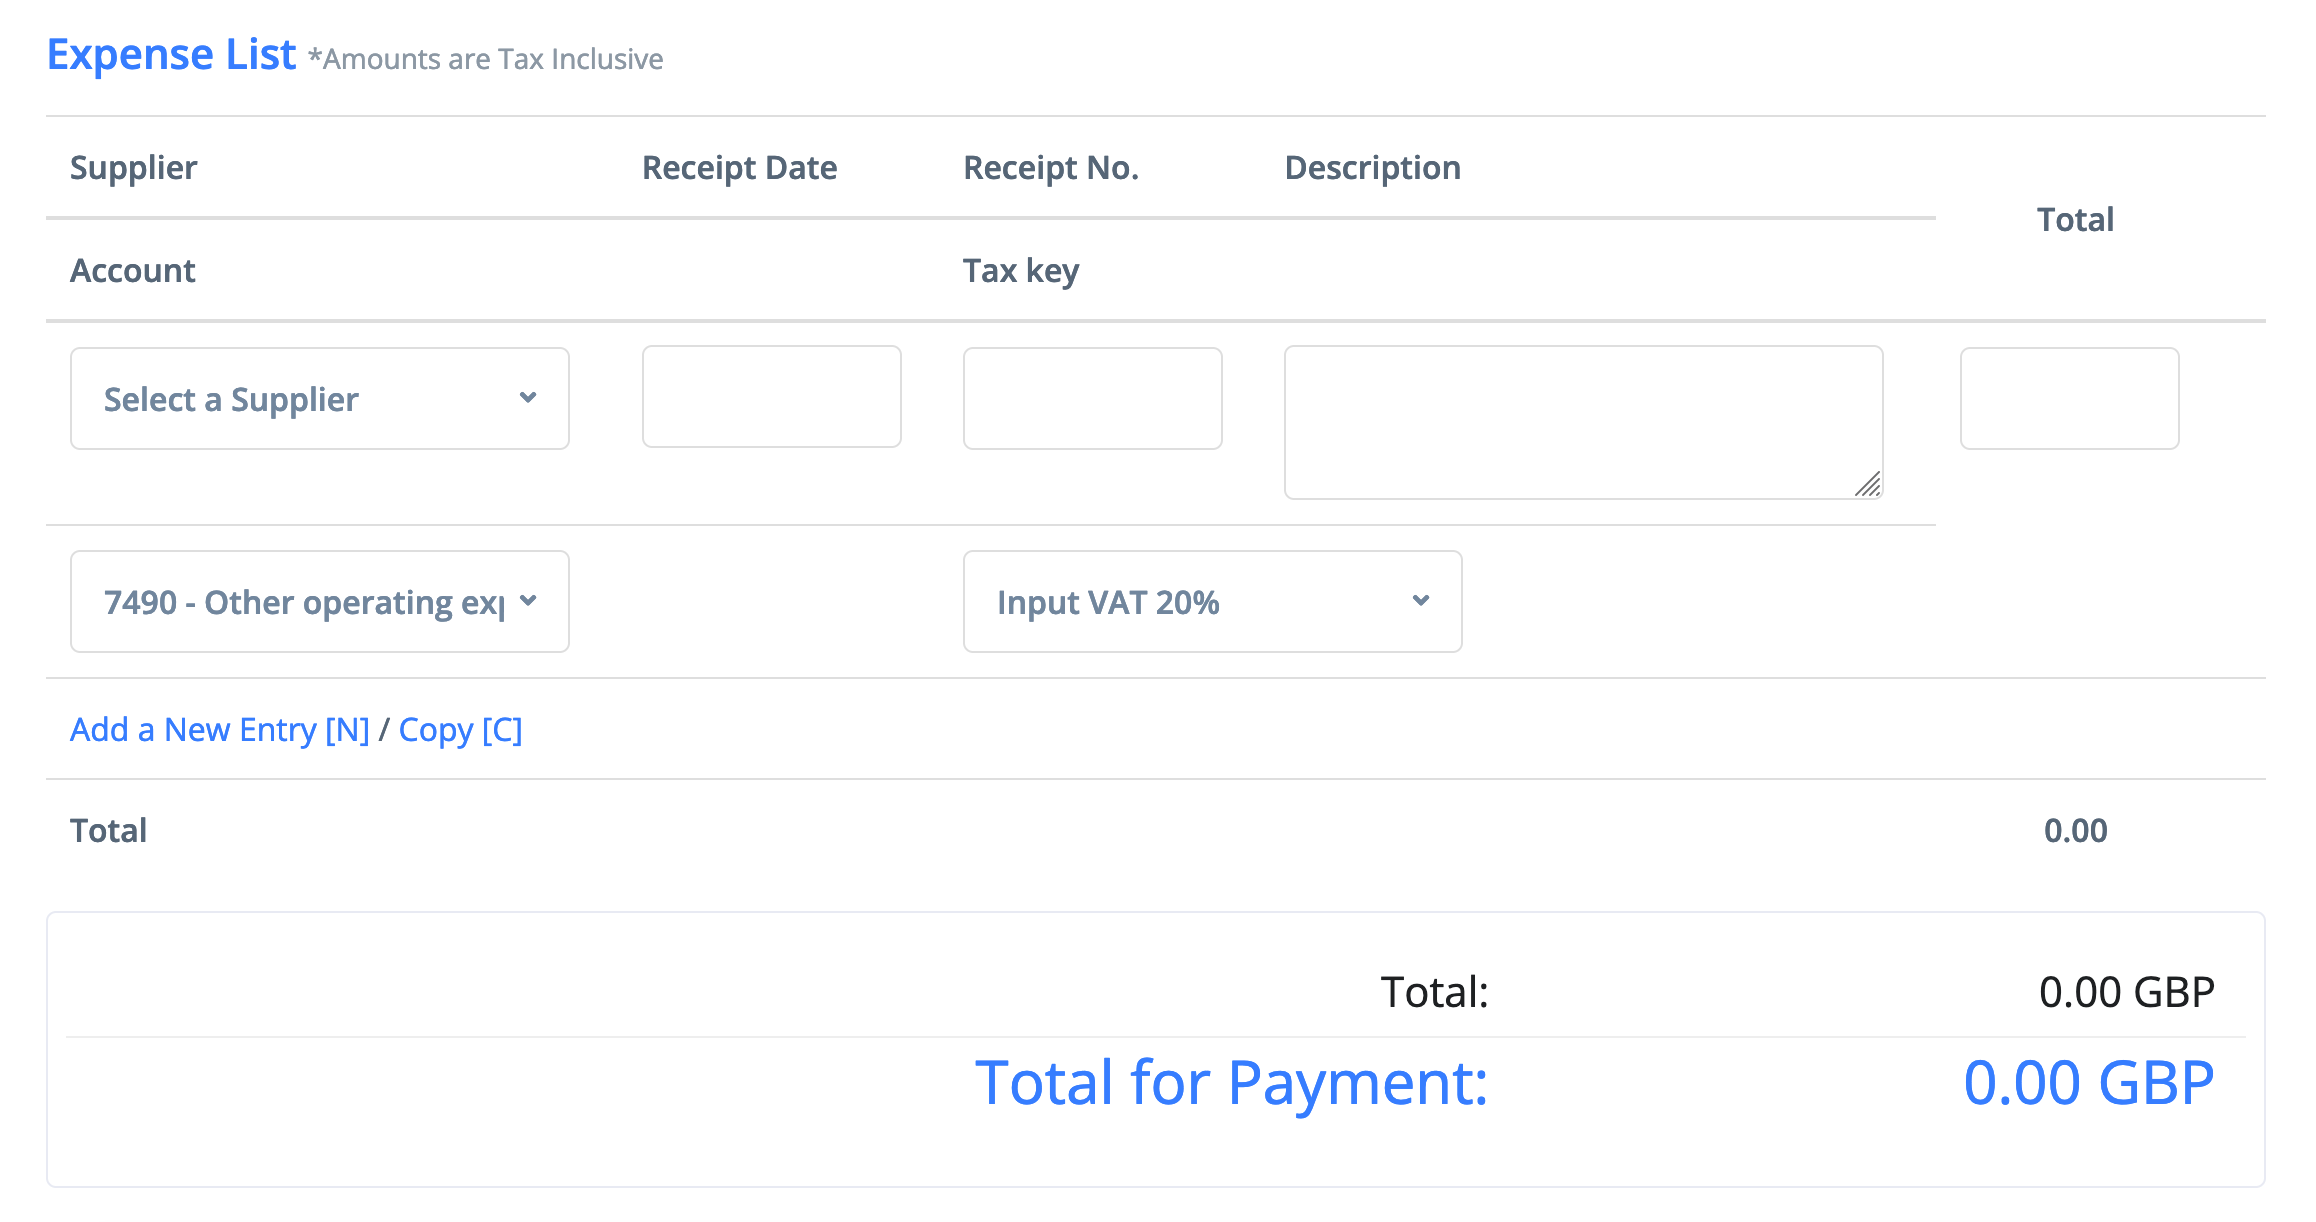
When you are done with the expense list click the Update button to save the information.
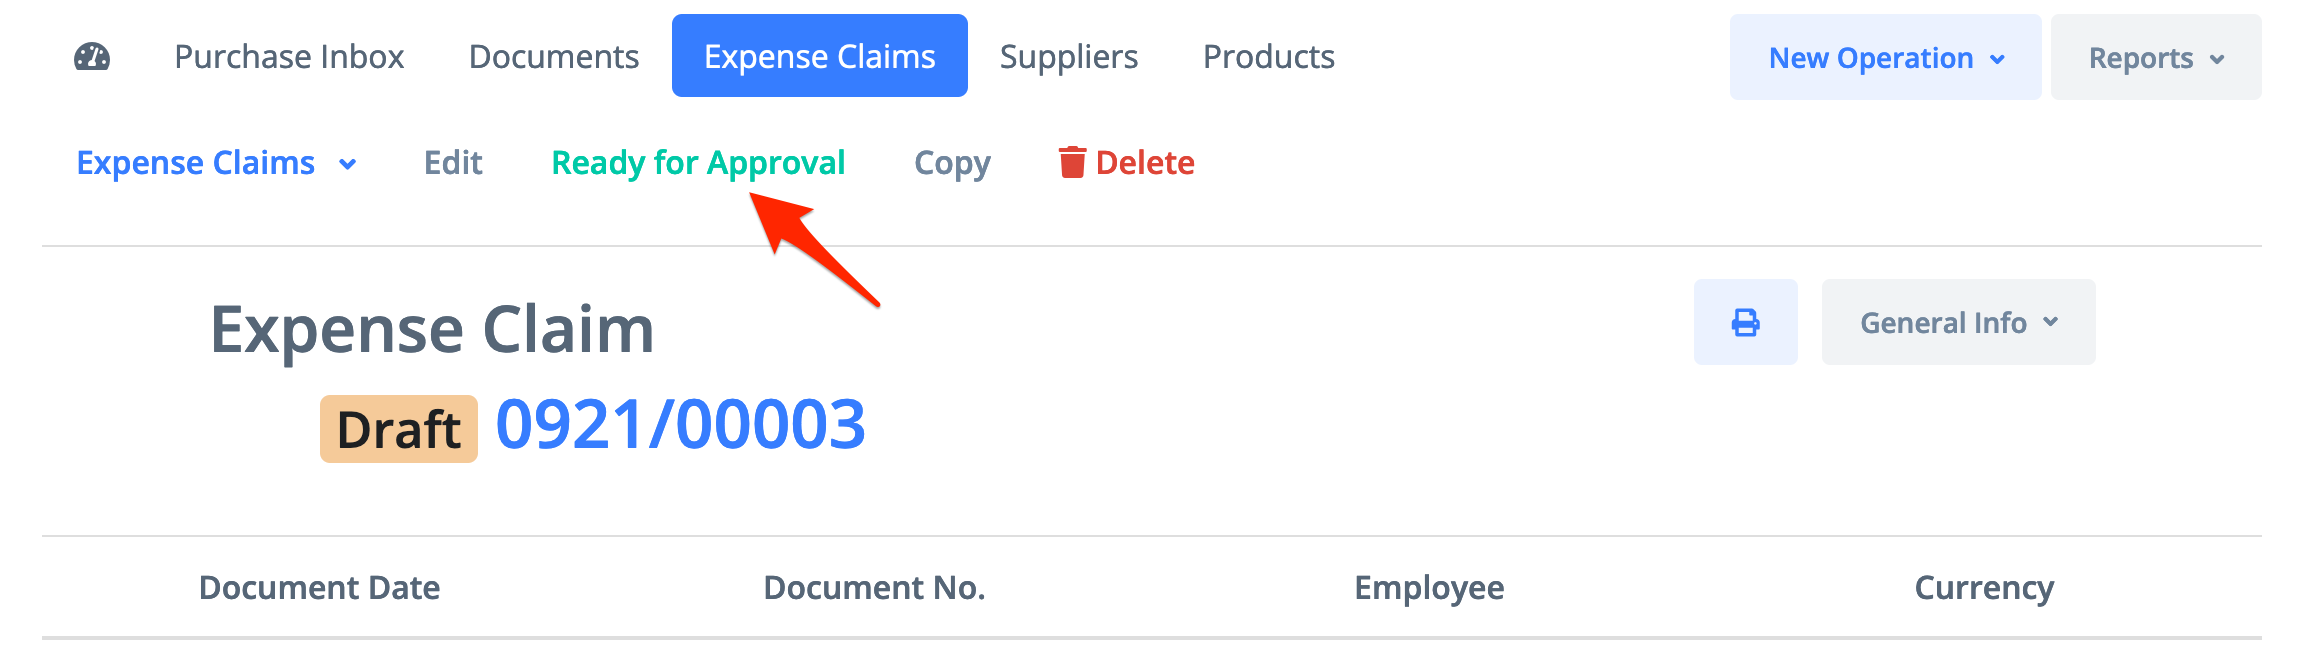
4) Check all the records, click Ready for Approval. The expense claim is entered and verified by the employee.
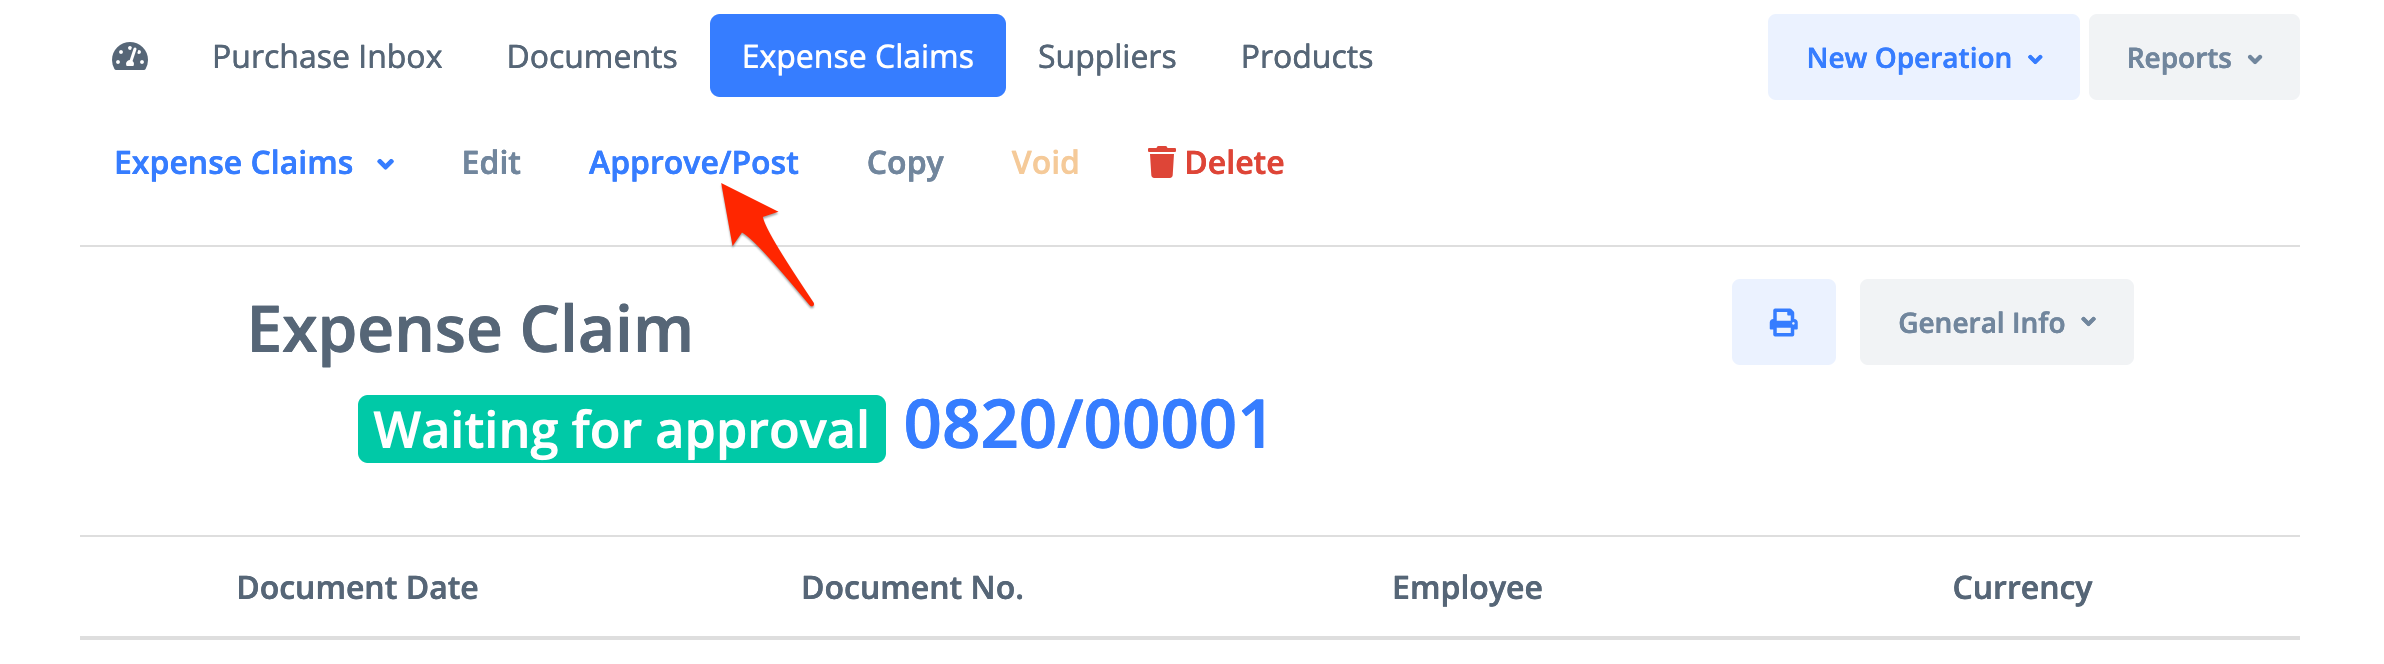
5) A user, with the right to approve any GL postings is able to verify and post the expense claim by clicking on the Approve/Post button.
The following journals will be generated:
A separate journal for every expense claim receipt
A journal for reimbursable expenses
* A new expense claim can be also created from Purchase Inbox