Integration with mobile cash register Tiki-Taka Pay includes automatic import of sales documents as well as cash deposit and collection transactions.
Information on new transactions is automatically uploaded from the cash register to the program within approximately 30 minutes. If necessary, the synchronization can also be started manually.
Integration Overview
Creation and activation of POS connector
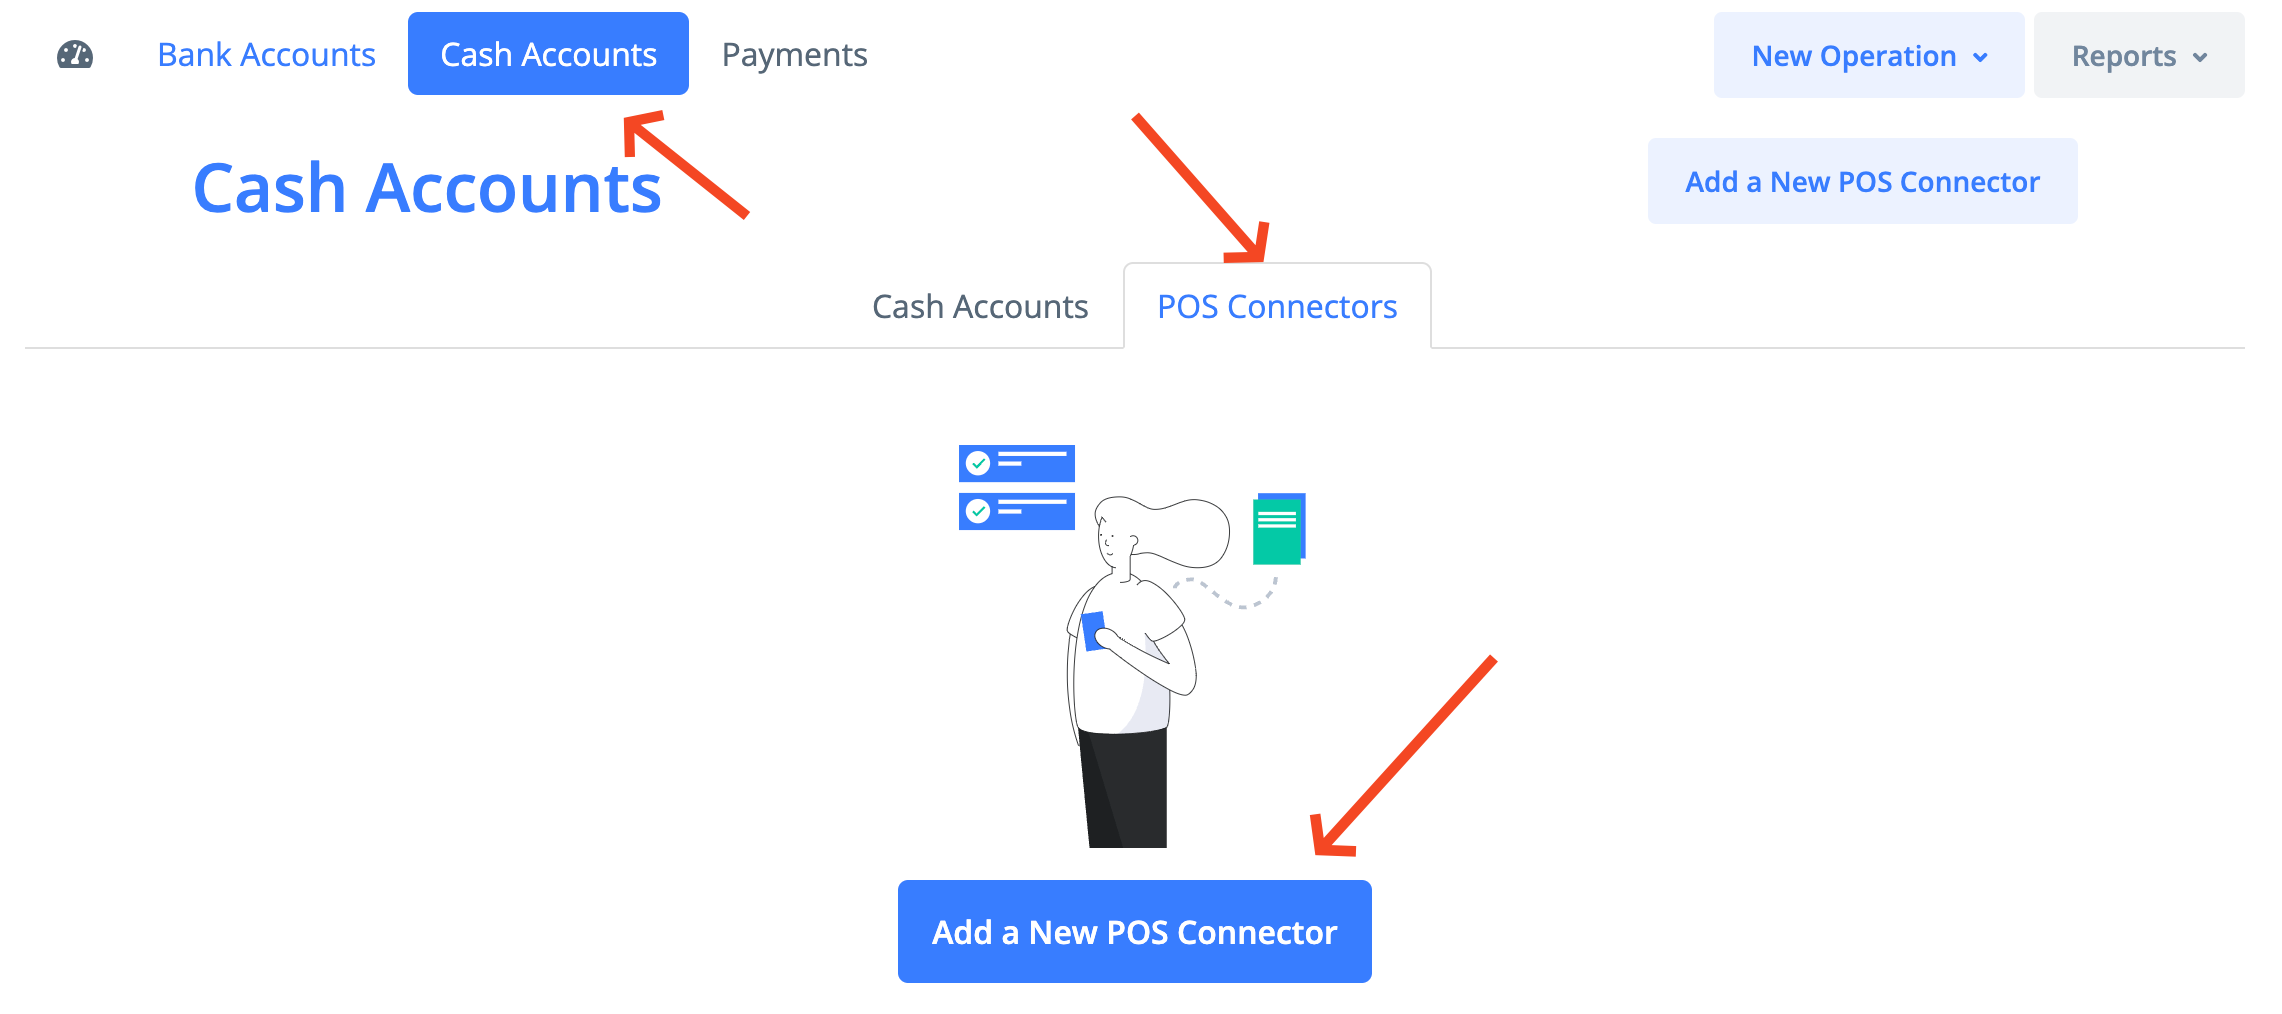
In the Money -> Cash Accounts section go to the POS Connectors tab and click on the Add a New POS Connector button.
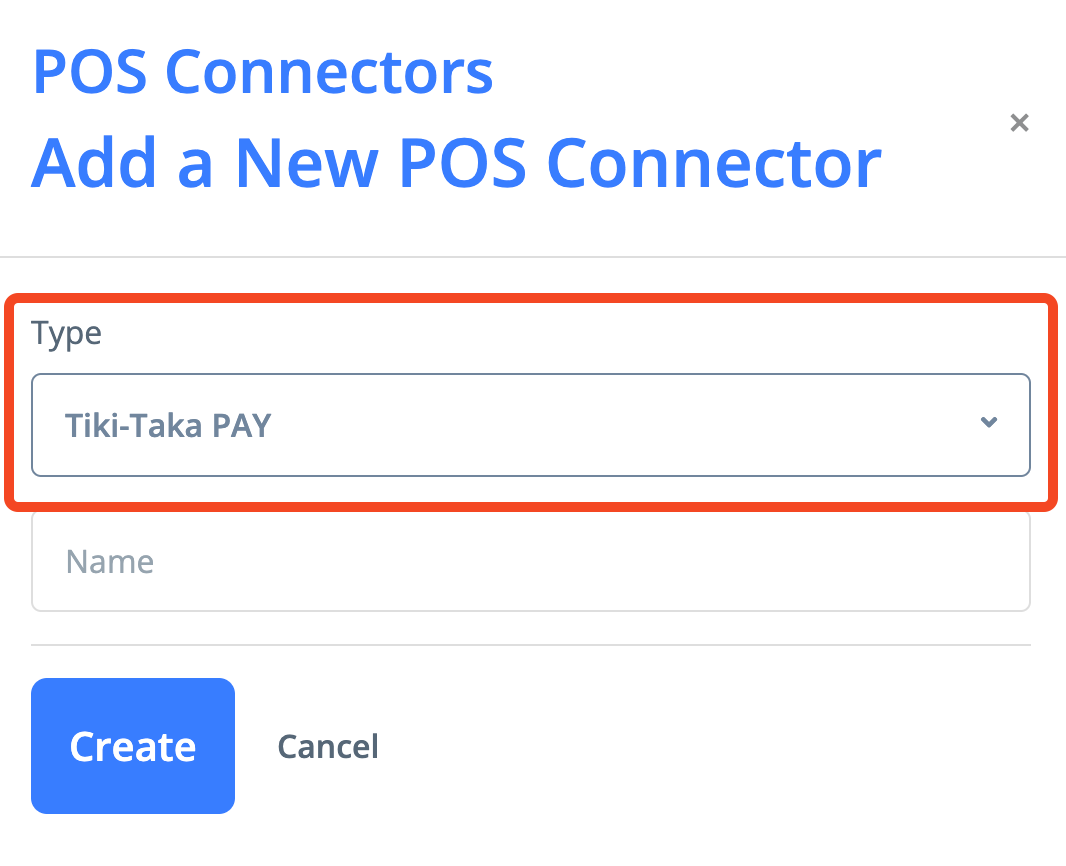
In the pop-up window that opens, select the POS connector type as Tiki-Taka Pay and click Create. Optionally, you can also specify a name (for example, it can be the name of the store where the cash register is used).
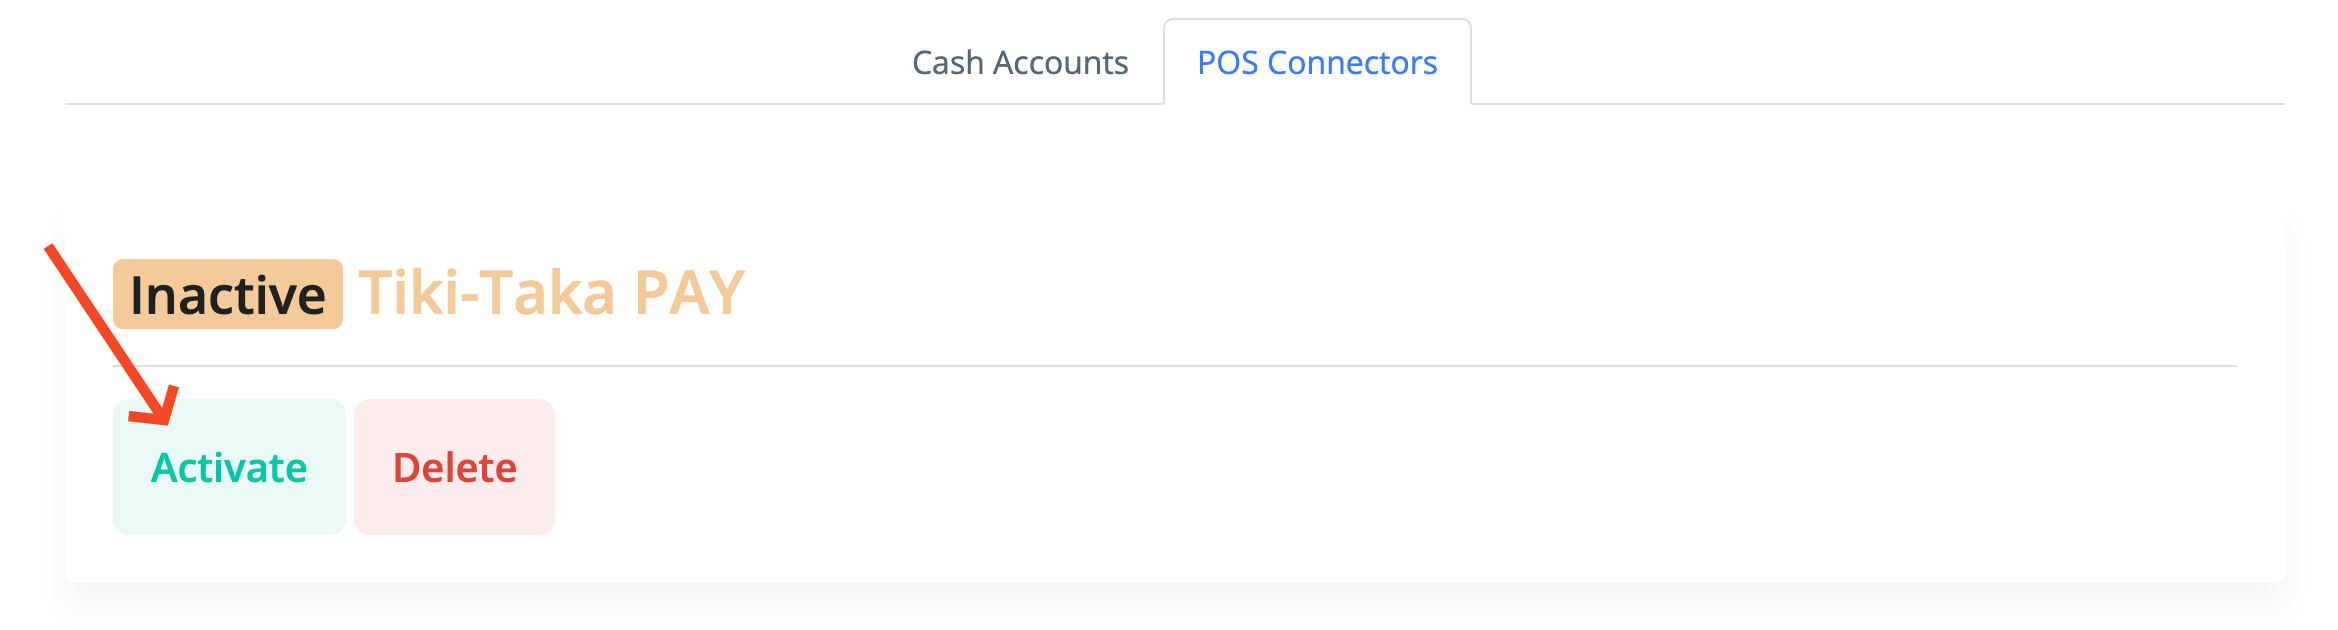
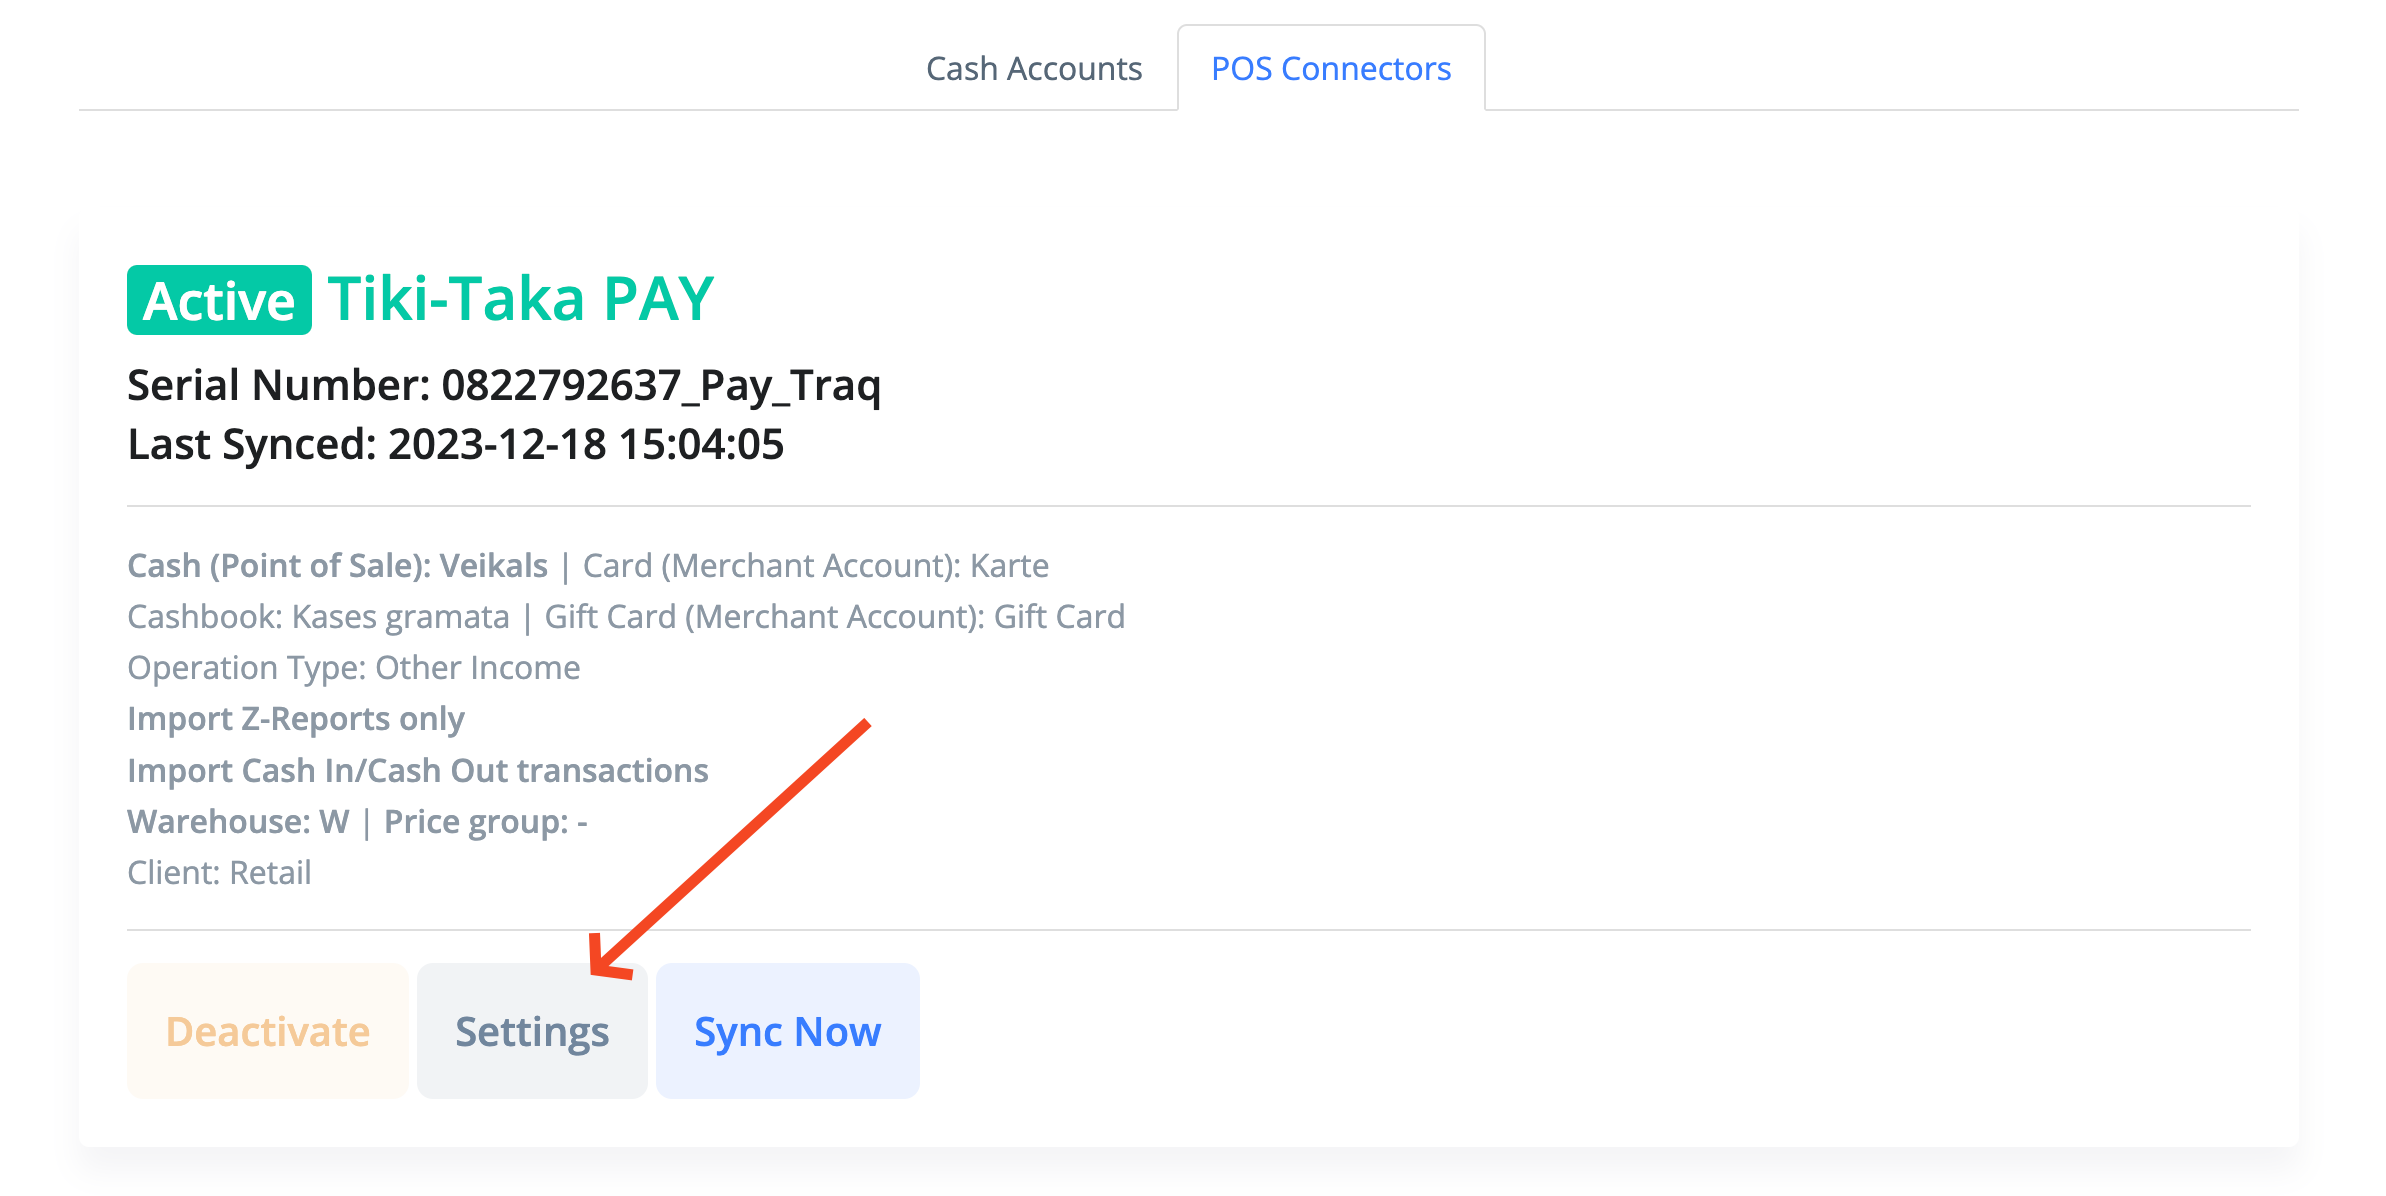
To activate, click on the Activate button.
On the first activation step you will need to enter your username and password to access the management portal manage.tikitaka.lv and click Continue.
On the next step you will need to pick the serial number of your cash register from the list and click Continue.
POS Connector Settings
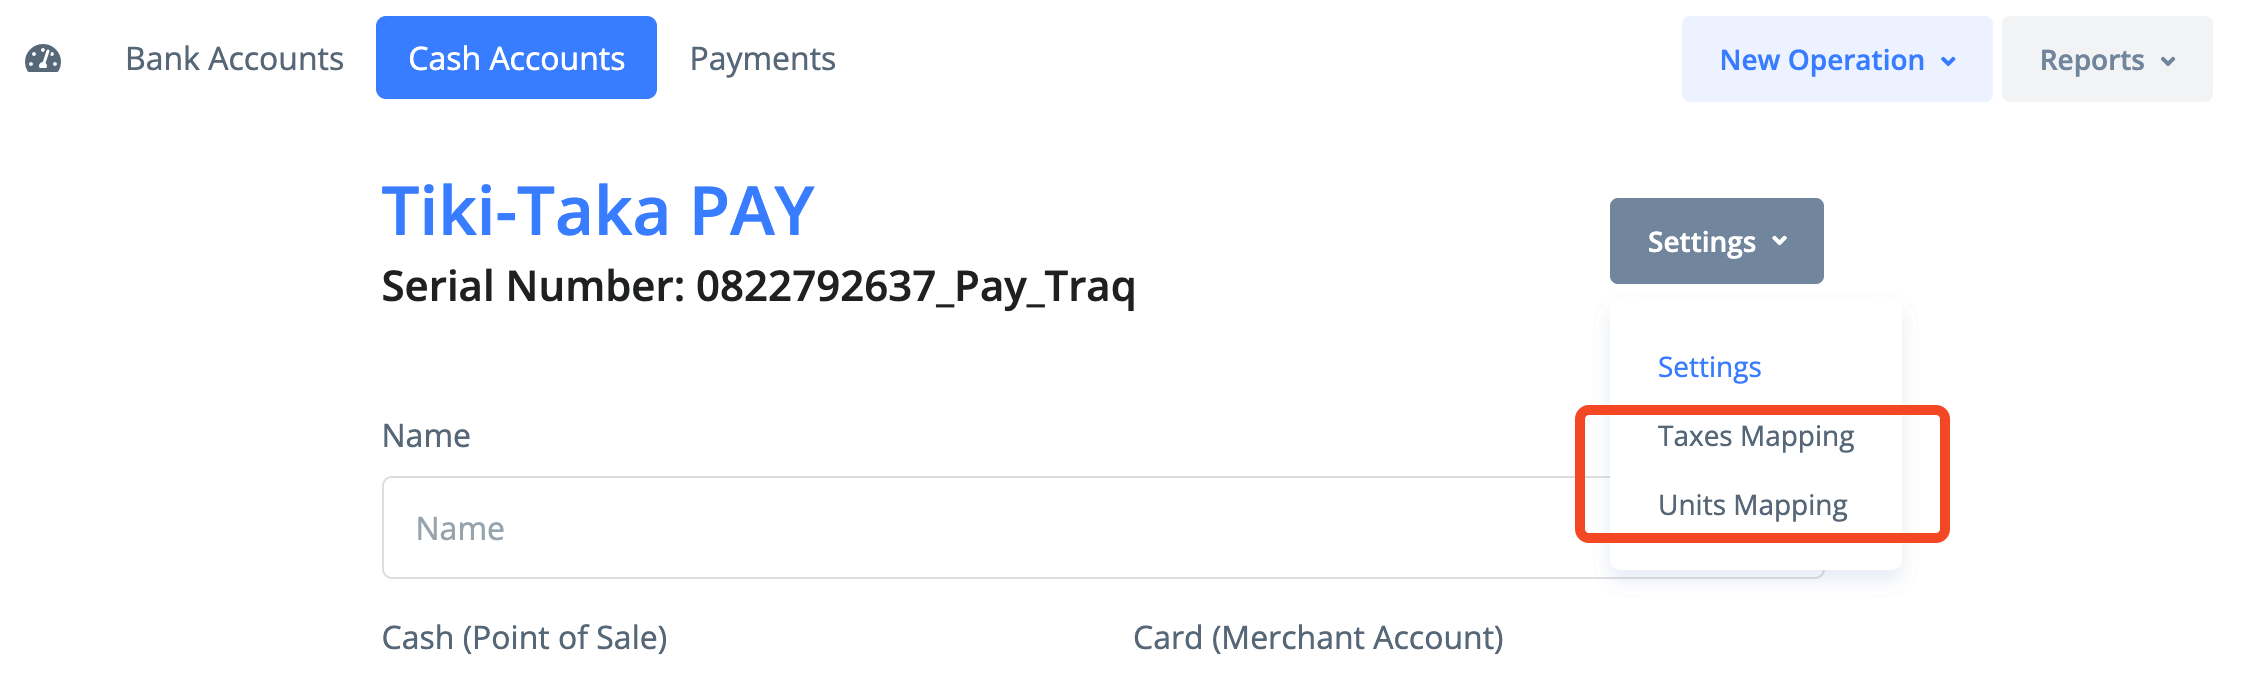
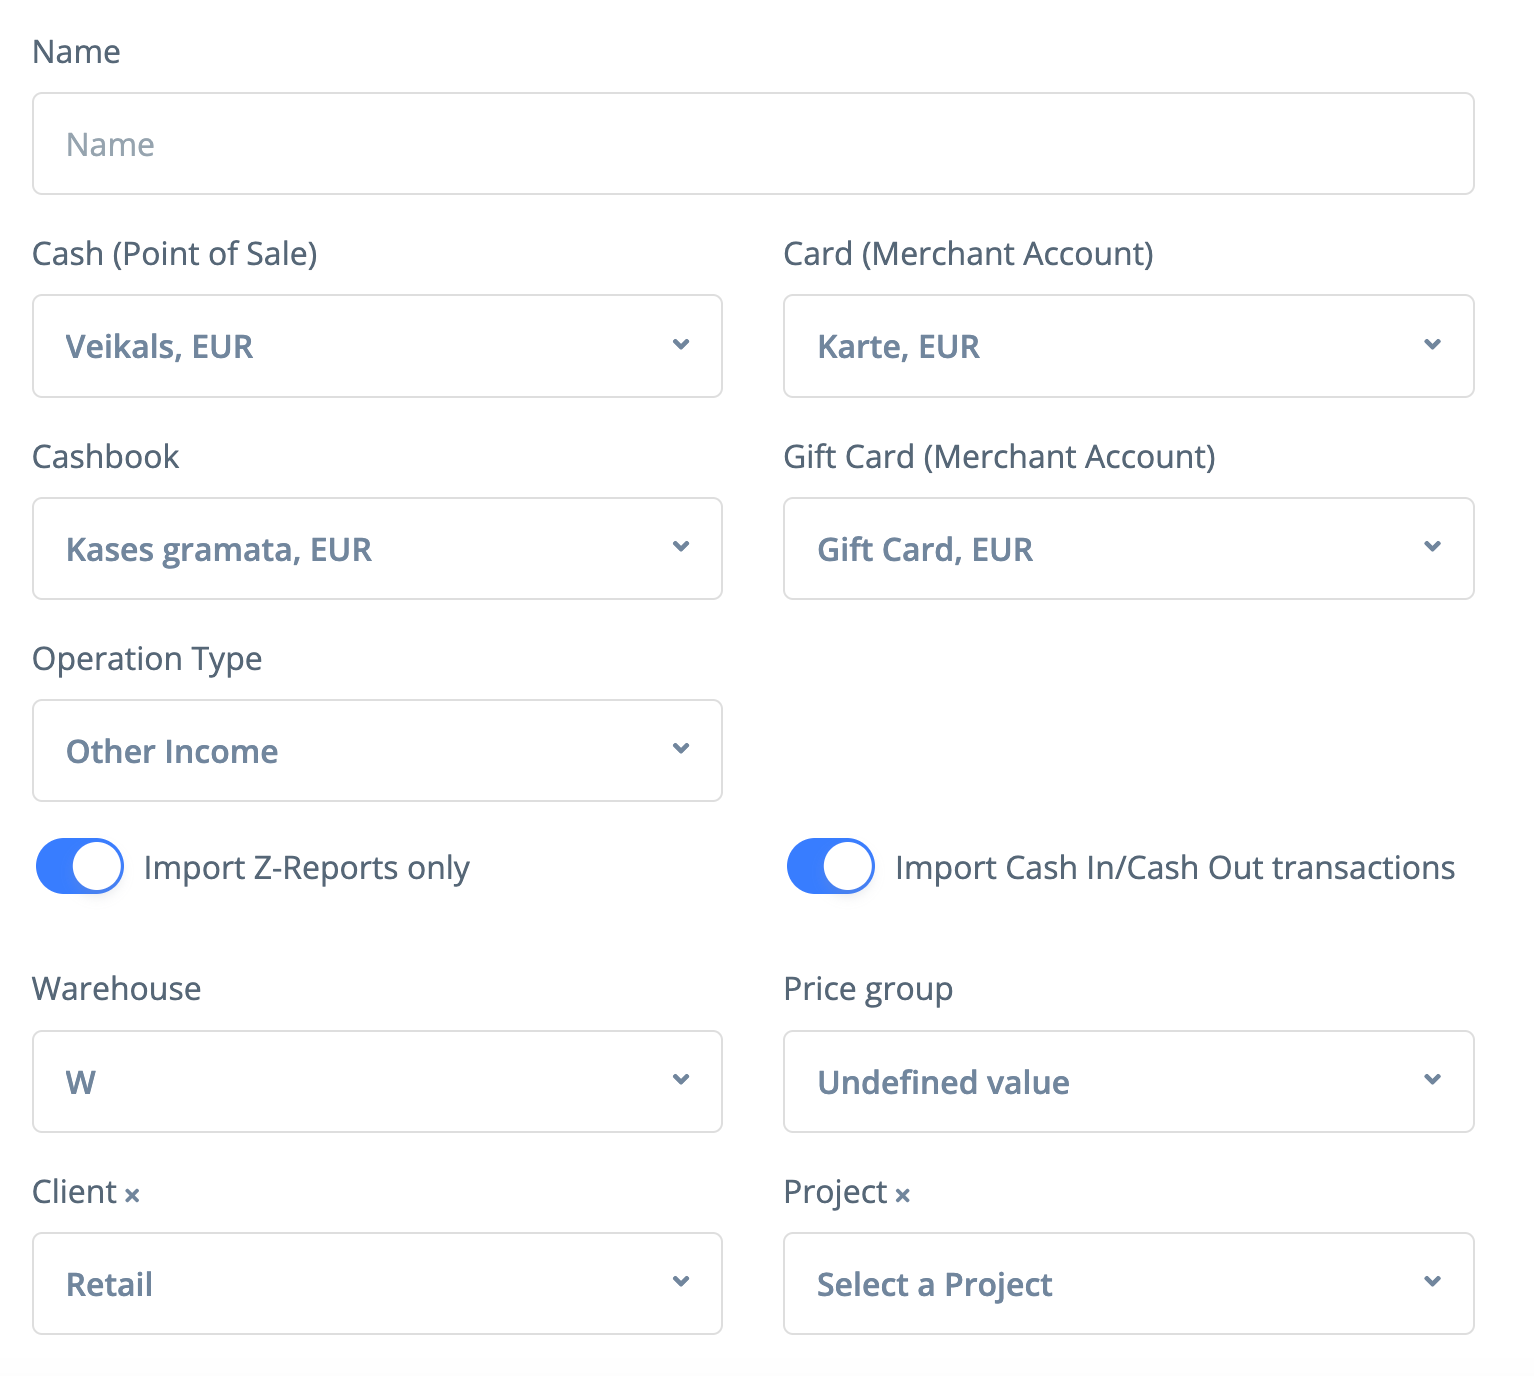
After activation is complete, it is necessary to proceed to the Connector settings.
The following settings are available:
Entering Sales
Sales can be imported in two ways:
1) Registration of each sales receipt separately
The "Import Z-reports only" checkbox should be inactive for this scenario!
For each sales transaction registered with a cash register, the program will create a sales document with the type of Sales Receipt. The operation type will be chosen from the settings, if not specified, then by default the Selling Goods will be used.
To register selling goods, it is necessary to specify Warehouse in the settings.
Search for sold goods and services is performed by code or name.
2) Registration of Z-reports only
To register only Z-reports it is necessary to activate the checkbox "Import Z-reports only".
For each Z-report a separate document with the type of Sales Receipt will be created. The operation type will always be "Other income".
Additionally, in the settings you can specify a retail client that will be used for all documents.
Similarly, you can set a project for all documents.
Entering payments
In order for payments to be entered, it is necessary to set up money accounts that correspond to each of the payment methods used:
Cash (Point of Sale) – a cash money account with the “Point of Sale” type (Payment Type - Cash).
Card Payment (Merchant Account) – bank money account with the “Merchant Account” type (Payment Type - Card). This payment method is optional, add it in case it's used.
Gift Card (Merchant Account) – bank money account with the “Merchant Account” type (Payment Type - Gift Card). This payment method is optional, add it in case it's used.
Entering cash deposit and cash collection transactions
To import cash deposit and cash collection transactions, the "Import Cash In/Cash Out transactions" checkbox must be activated.
If you have set up a cashbook account (cash account with the type “Cashbook”), then two documents will be created for each transaction:
For cash deposit (Cash In) - Incoming cash payment on Cash (Point of Sale) account and Cash Credit Voucher on the Cashbook account.
For cash collection (Cash Out) - Outgoing cash payment on Cash (Point of sale) account and Cash Debit Voucher on the Cashbook account.
If the cash book account is not specified, no cash vouchers will be created. For each transaction only one document will be created on Cash (Point of Sale) account.
A transit money account is used as a correspondent account for these operations.
Getting started
After all settings are completed, the first synchronization should be started manually by pressing the Sync Now button. The first synchronization uploads documents starting from the current date.
After that new documents will be imported automatically.
For each document created in the program, a PDF file with the original contents of the receipt printed in the cash register is also available in the Files section of the document.
Online Orders
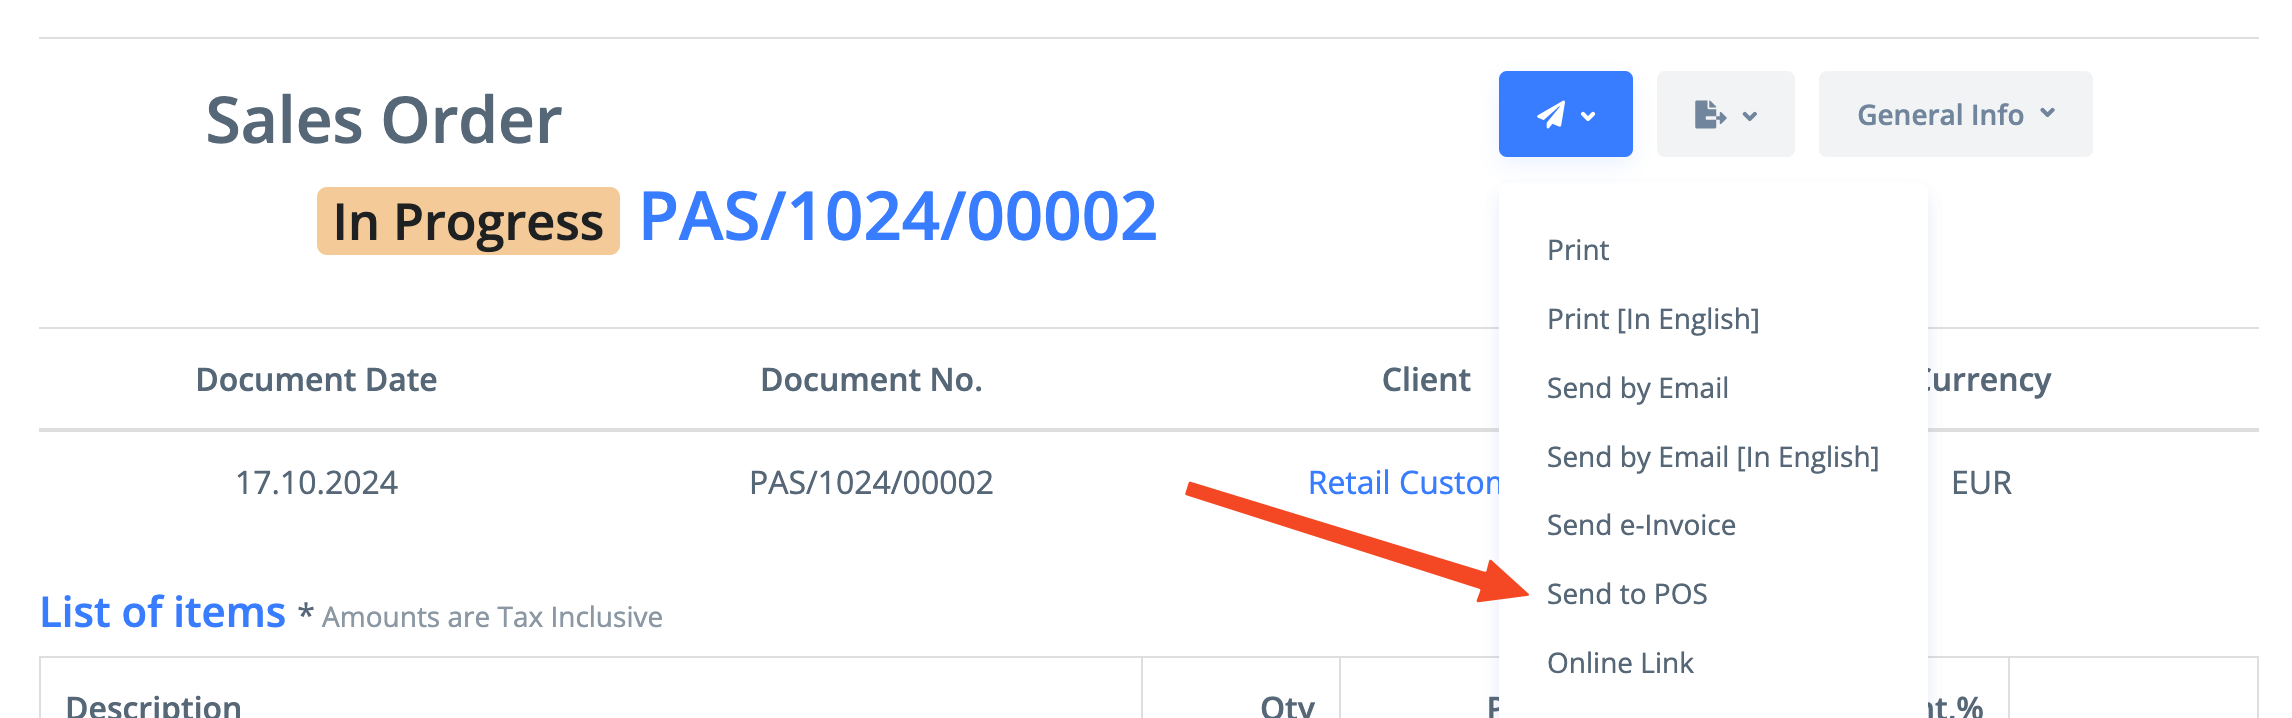
It is also possible to send orders from PayTraq to Tiki-Taka.
To do this, select the "Send to POS" option in the order.
The order can be closed immediately upon sending or it will be closed after receiving a receipt from Tiki-Taka.

In the connector settings, you can additionally configure the mappings between units of measurement and tax keys in PayTraq and units of measurement and tax categories in Tiki-Taka.