The prepaid expenses functionality is designed to correctly allocate costs that must be distributed across multiple calendar periods.
Creating a Document with Prepaid Expenses
The prepaid expenses feature is available for invoices with the operation types “Purchasing Services” and “Other Expenses”.
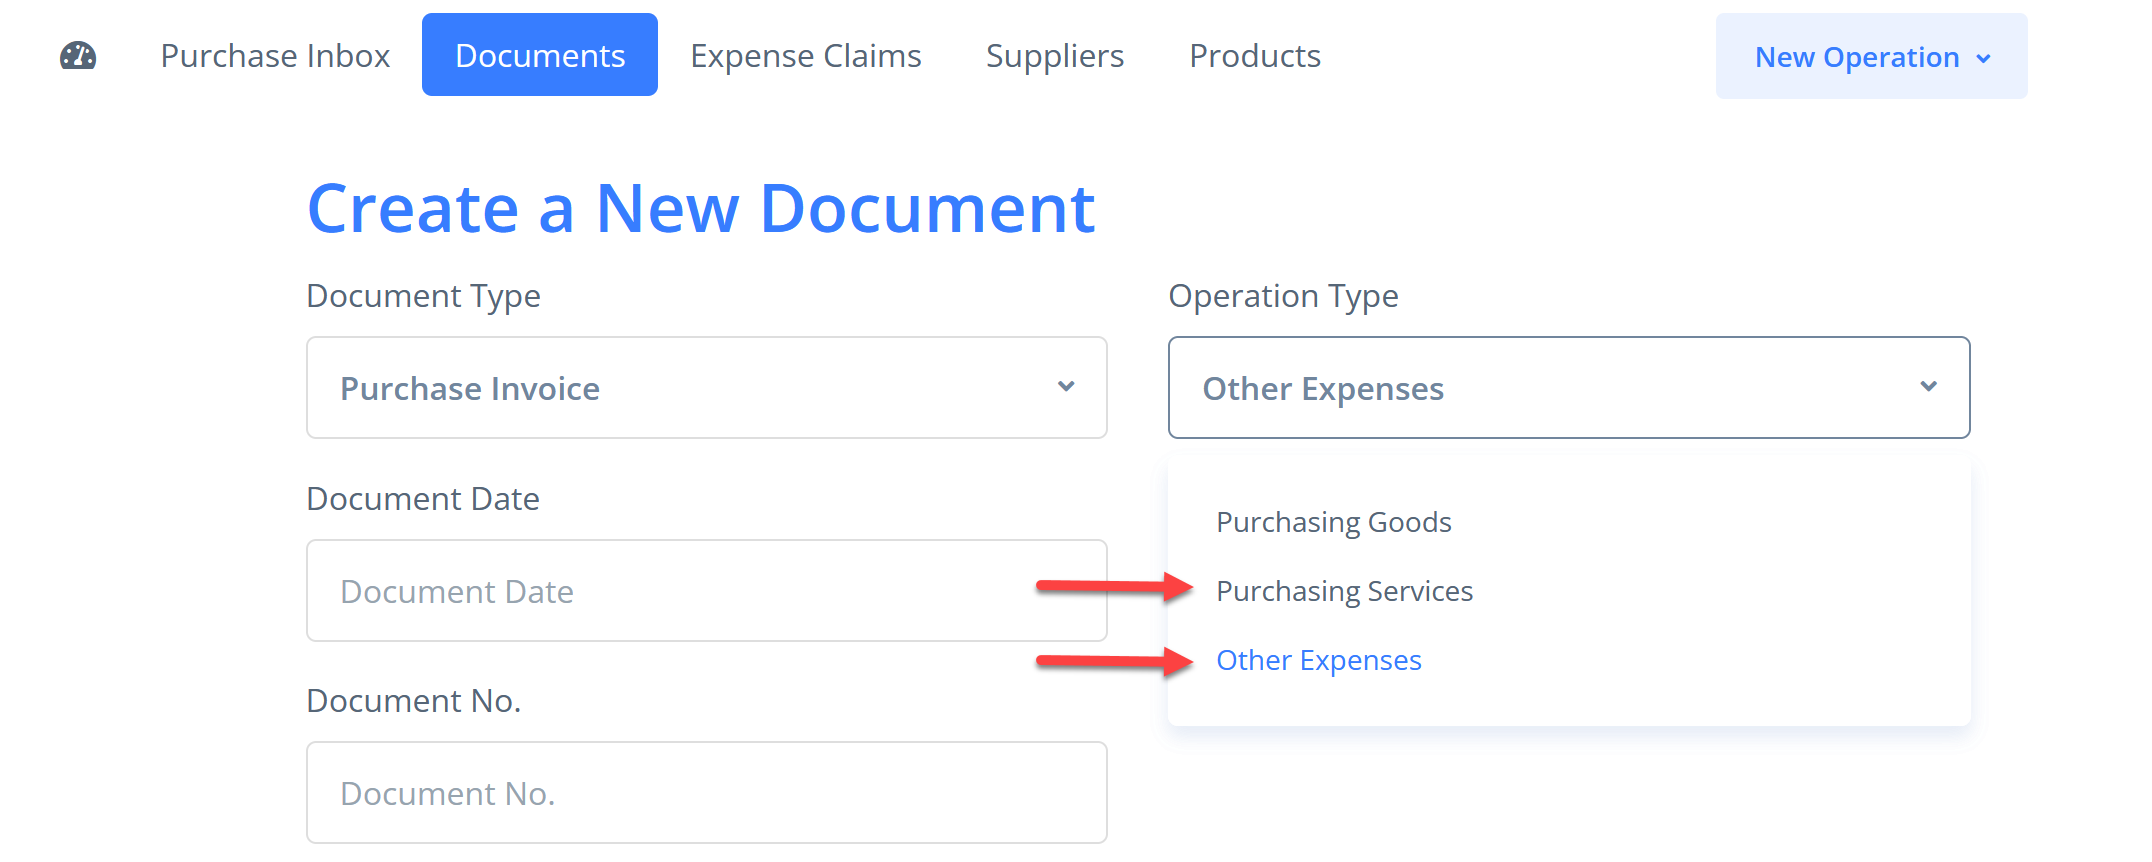
When creating a purchase invoice in the program, select a General Ledger (GL) account from the Prepaid Expenses group of accounts in one of the invoice lines.

A document may contain several such lines, and these lines can use either the same or different GL accounts from the Prepaid Expenses group.
Prepaid Expenses Section
After confirming the invoice (by clicking “Post”), a “Prepaid Expenses” section will appear in the document menu.

In this section, the user can specify how the amounts listed in the invoice lines will be expensed.
At the top of the section, an information panel labeled “Unallocated amount” shows the portion of the amounts specified in the document that has not yet been scheduled for expense allocation.

Creating the Expense Allocation Schedule
To create an expense allocation schedule, select the GL expense account in the Debit field where the expenses will be allocated. In the Credit field, the default account for prepaid expenses will already be selected. If necessary, you can choose another existing account from this group.
Setting the Posting Dates
In the Start Date field, specify the date of the first posting for the expense allocation (note that the date of the first posting must not be earlier than the invoice date!). All subsequent postings will be generated automatically at one-month intervals.
Configuring the Periodization
In the Number of months field, select the expense period from the drop-down list. The available range is from 1 to 36 months. The unallocated balance will be evenly distributed over the selected number of periods.
Filling in the Description field
The Description field is intended to record information that will appear in the future expense postings, ensuring that it is immediately clear which expense is associated with each posting.
If the invoice contains a single prepaid expense line, the Description field is automatically populated with the text from that line. This text can be edited by the user.
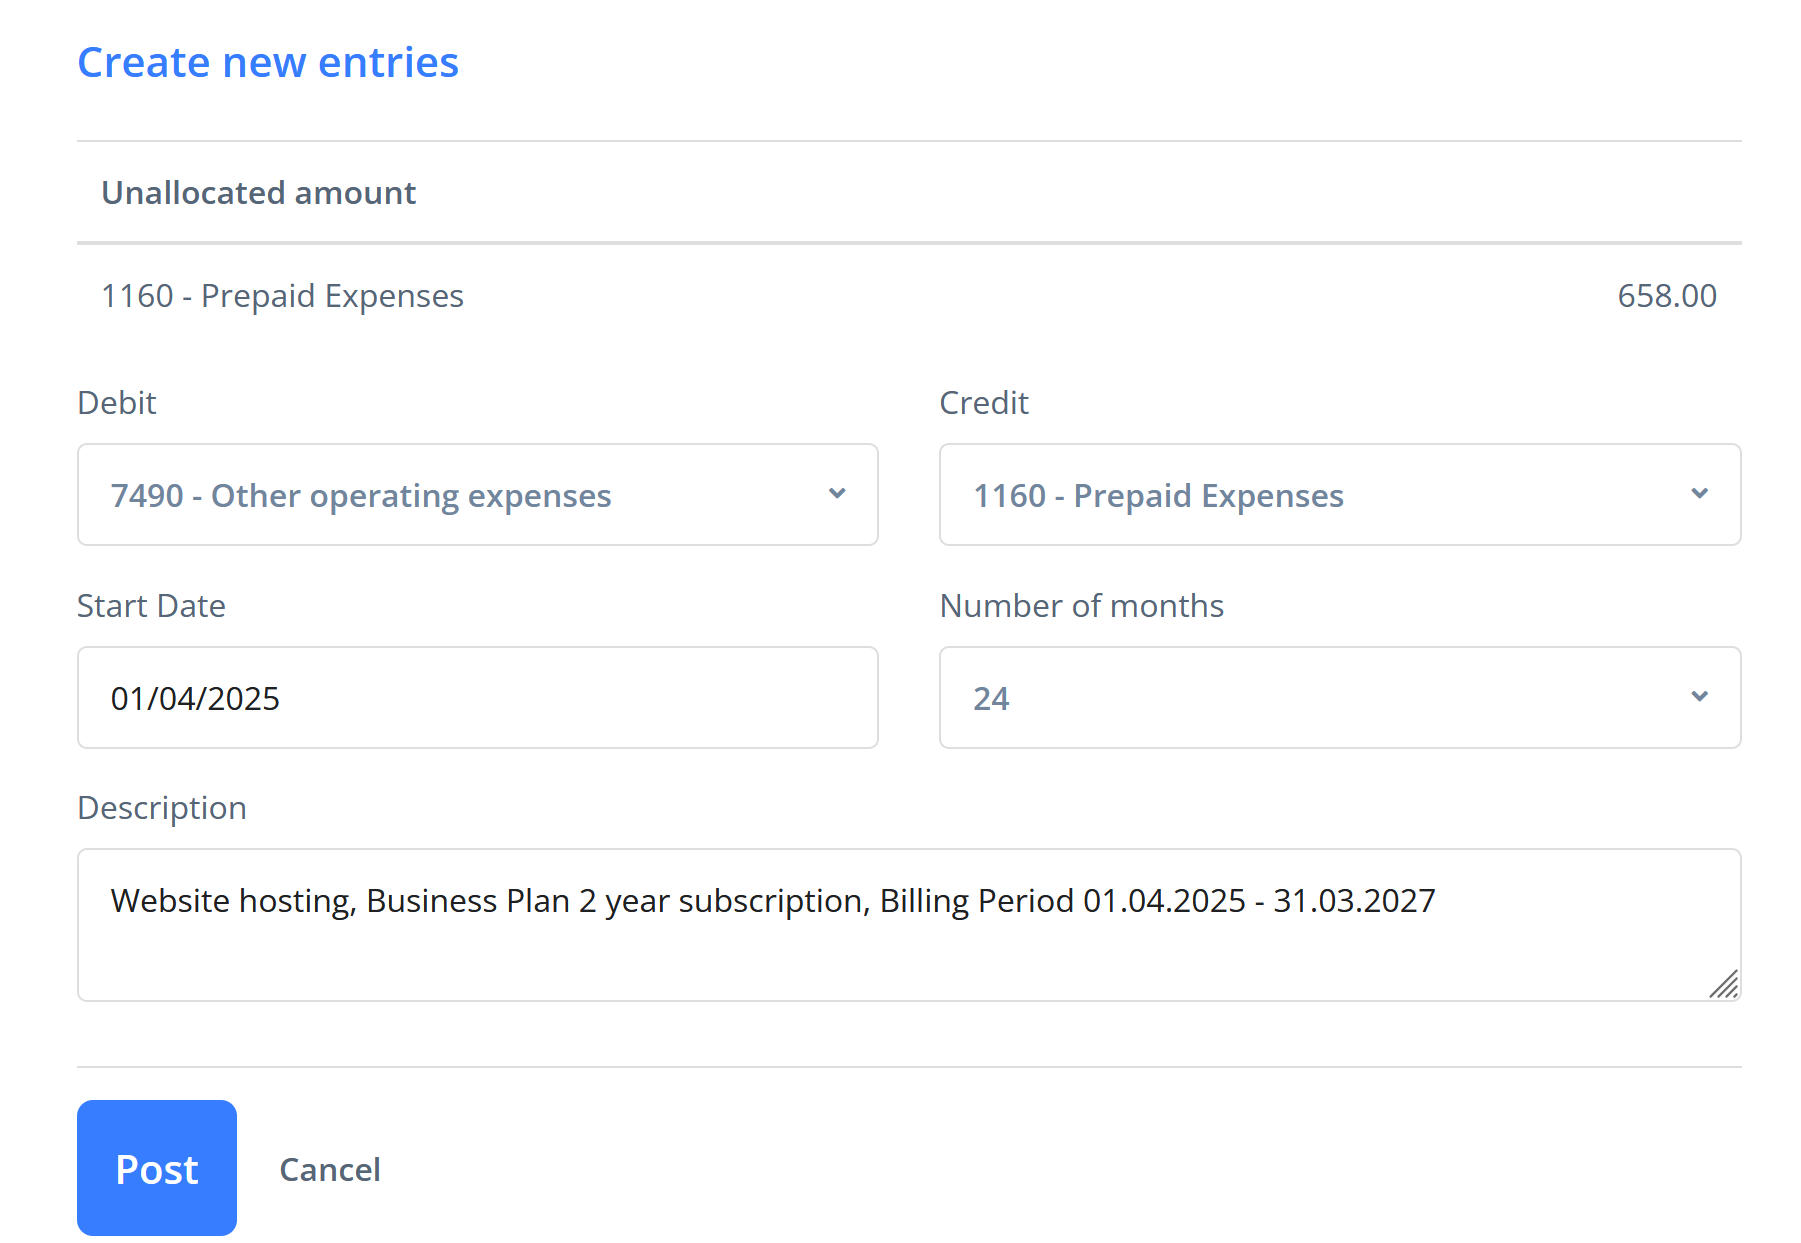
If there are multiple lines, the Description field remains empty, and its content is left to the user’s discretion.
Generating the List of Postings
After clicking the “Post” button, a list of journal entries for writing off the unallocated balance in equal installments for the selected number of periods will be created. All generated entries will appear in the “Prepaid Expenses” section of the corresponding invoice.
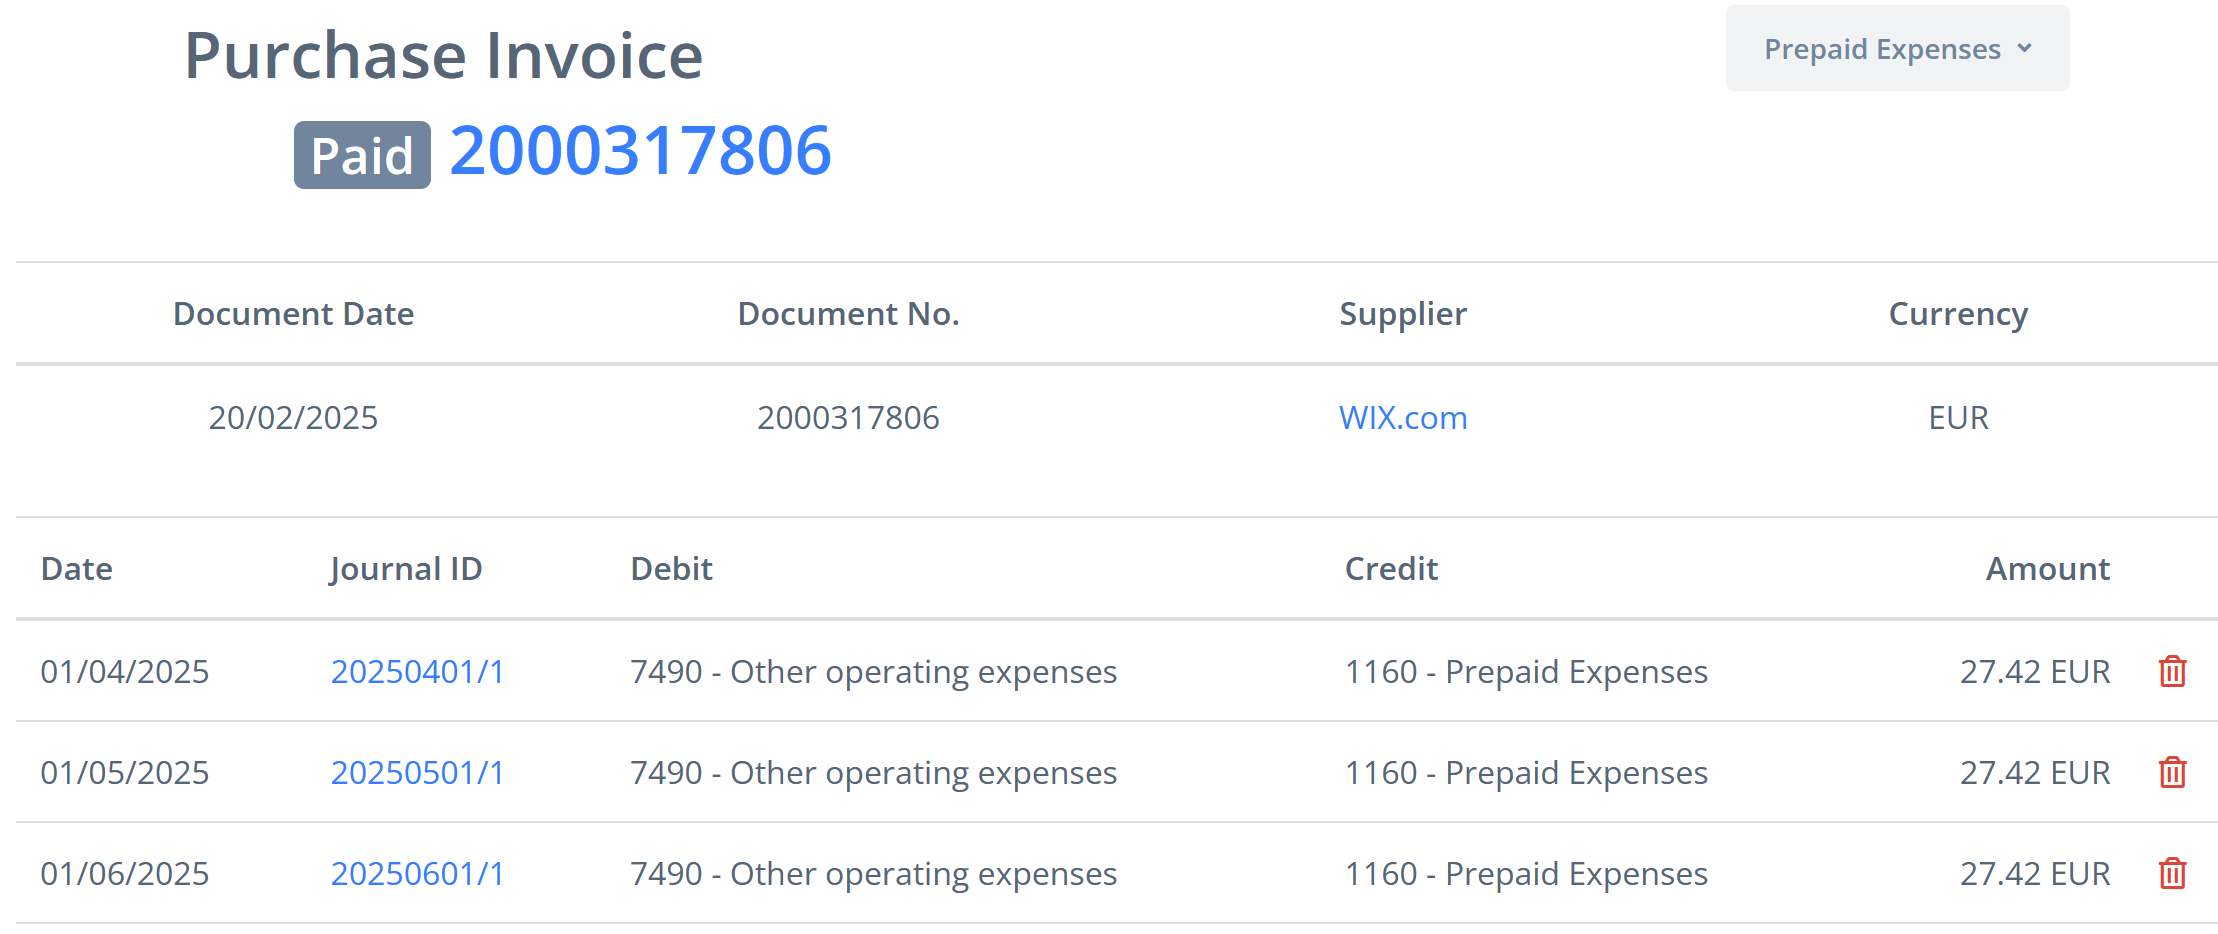
The unallocated balance for the selected GL account from the Prepaid Expenses group will then become zero.

If multiple GL accounts from the Prepaid Expenses group are used in the expense invoice, separate posting schedules must be created for each of them.
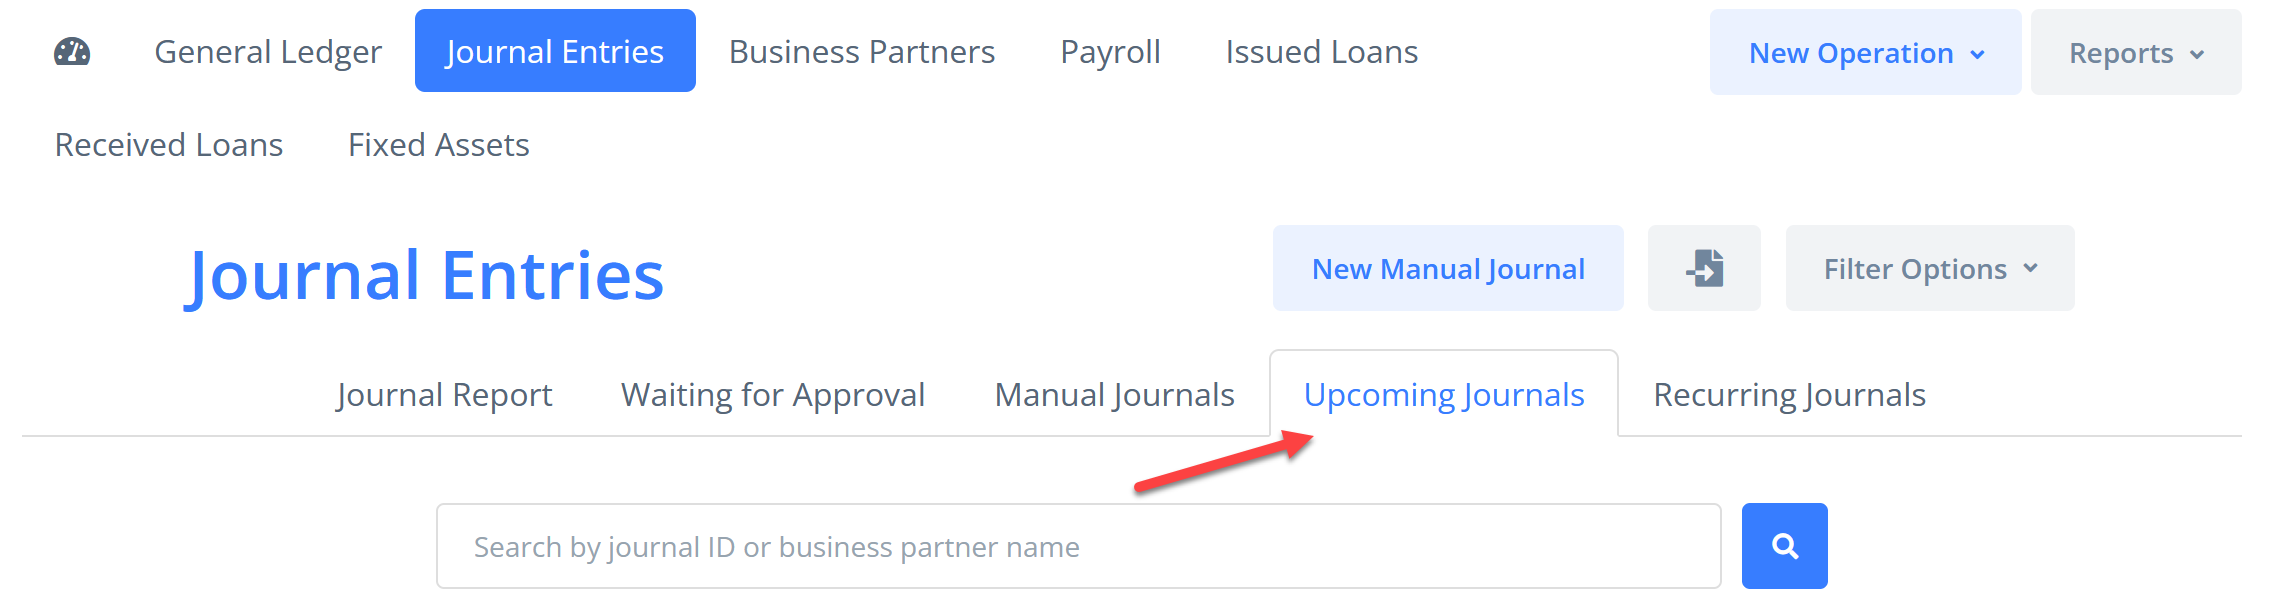
A complete list of all journal entries for the future prepaid expense allocations will be available in the “Upcoming Journals” tab under Accounting → Journal Entries.
Corrections
If necessary, you can delete one or more future journal entries. To do this, click the Trash icon next to the relevant entry in the “Prepaid Expenses” section.
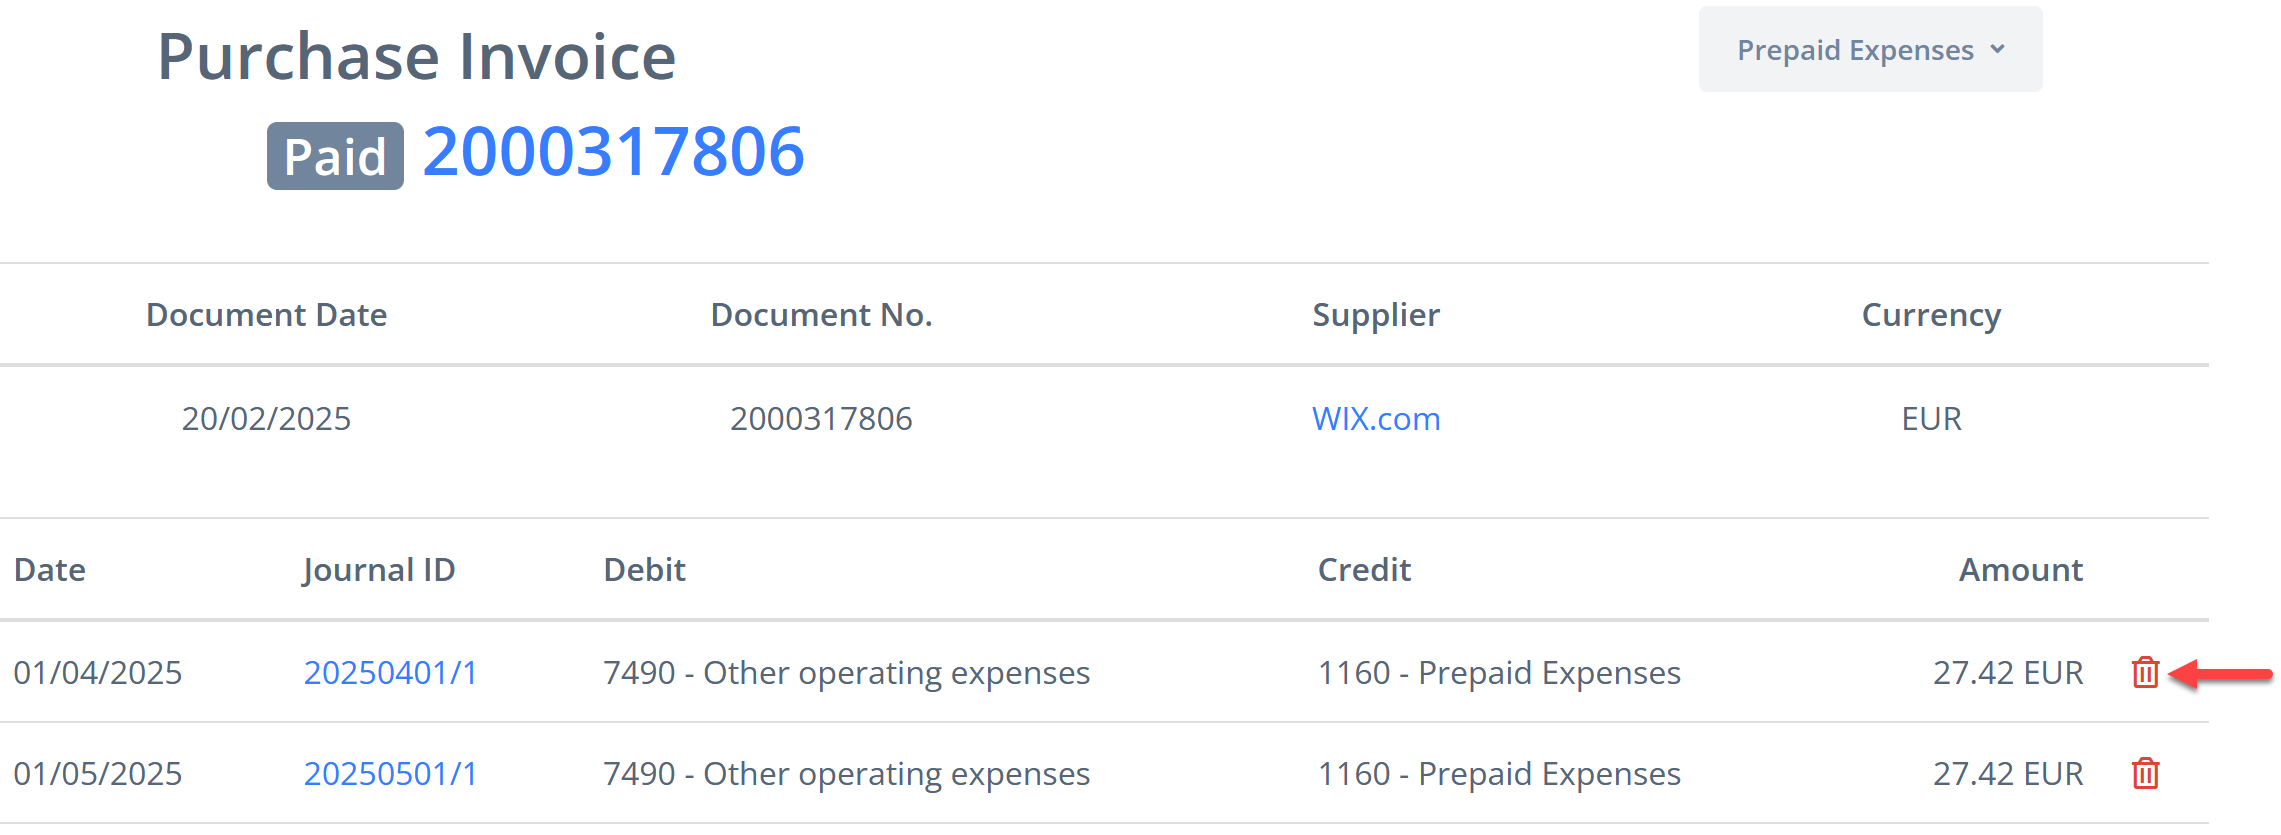
Deleting the selected future journal entry does not affect the others. After deleting one or more future journal entries, the unallocated balance is recalculated and will reflect the amount for which an additional expense schedule can be made.
Cancelling Invoice Posting
If the invoice posting is reversed, all journal entries associated with the prepaid expense allocation are automatically deleted. After re-posting the invoice, the expense schedule will need to be generated again.