Physical Inventory Adjustment is one of the types of operations to correct inventories.
You can use a Physical Inventory Adjustment to increase or decrease the available quantity for tracked inventory items.
This type of inventory adjustments is usually used after the count has been performed.
To record the physical inventory adjustment do the following steps:
1) Select the menu Warehouse -> New Operation -> Create a New Inventory Adjustment or go to Warehouse -> Documents -> Inventory Adjustments and click on Create a New Inventory Adjustment
2) Select the adjustment type: Physical Inventory.
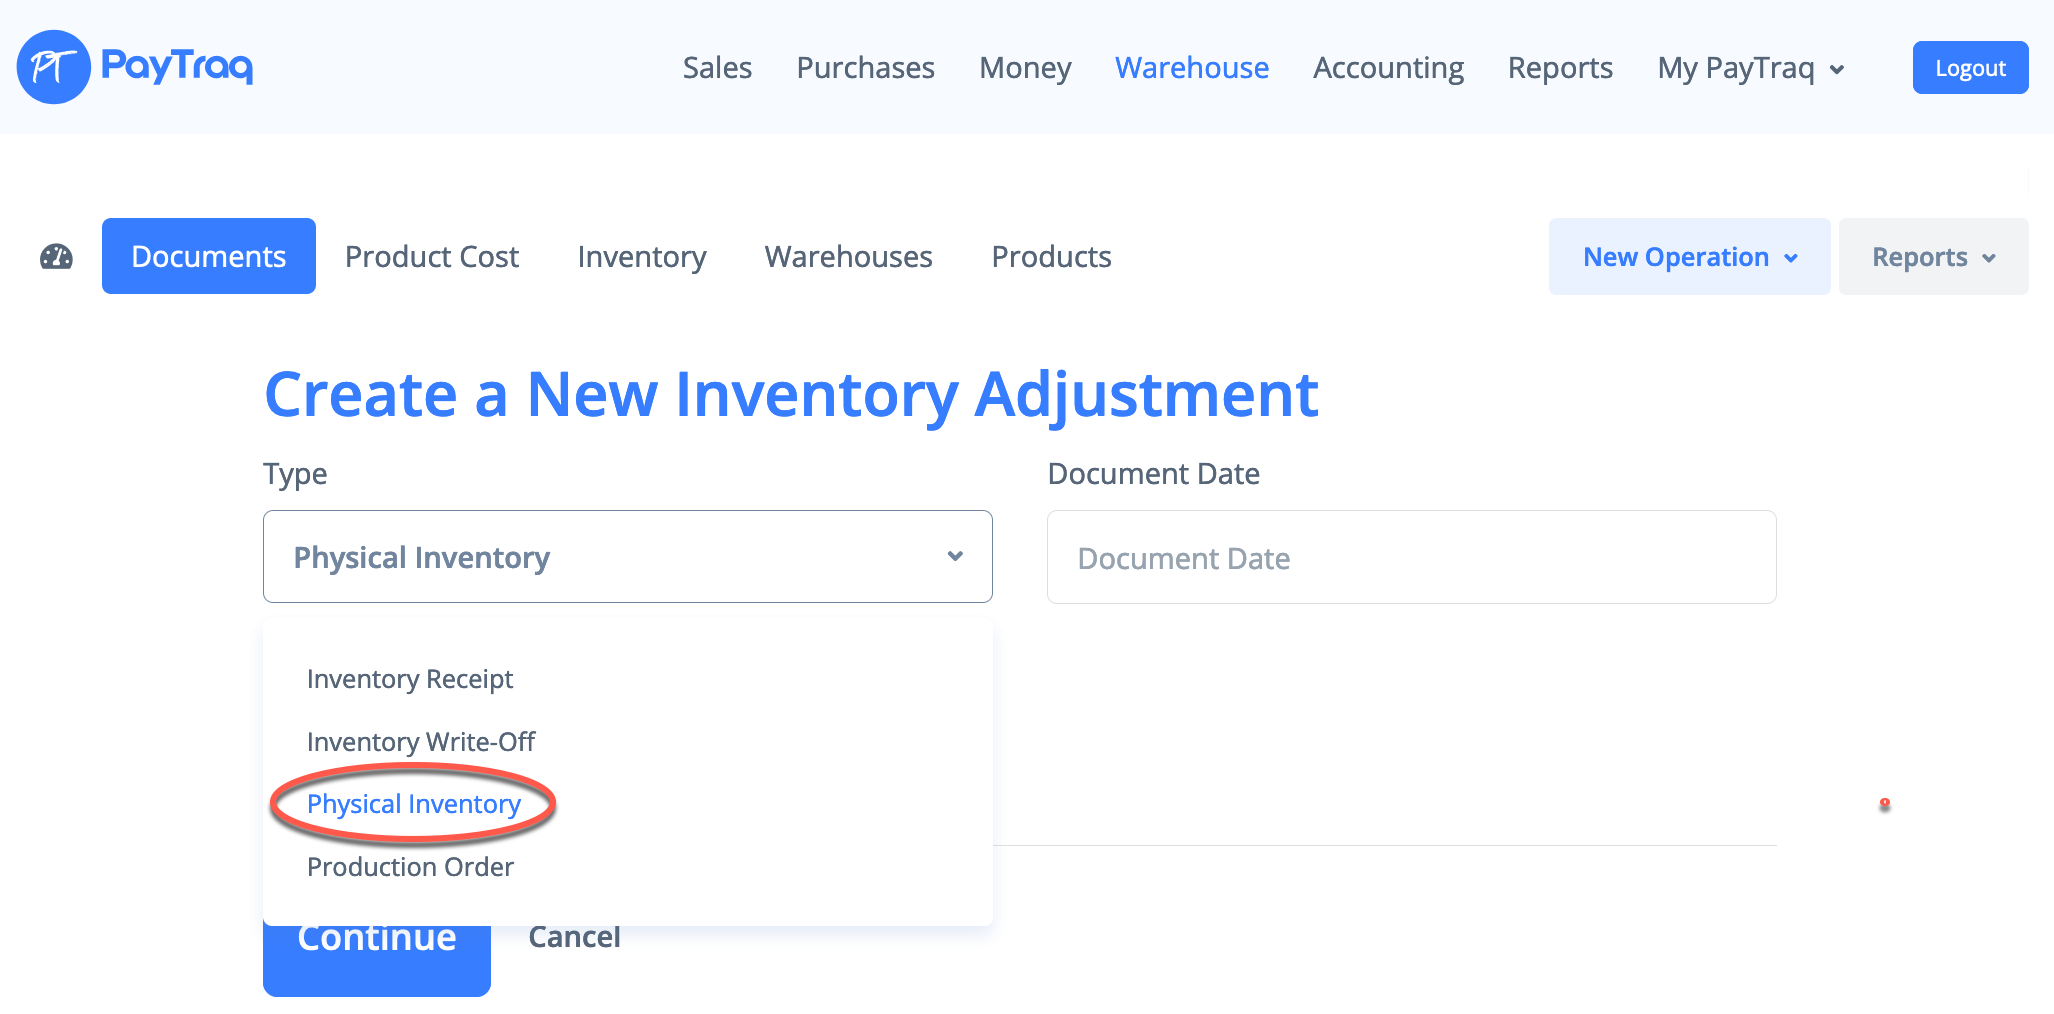
3) Enter the date, select the warehouse. Press the “Continue” button.
4) Add to the list those items for which, as a result of the count, was detected a difference between the available quantity according to the data in the program and the actual quantity in stock. Add the actual quantity of an item.
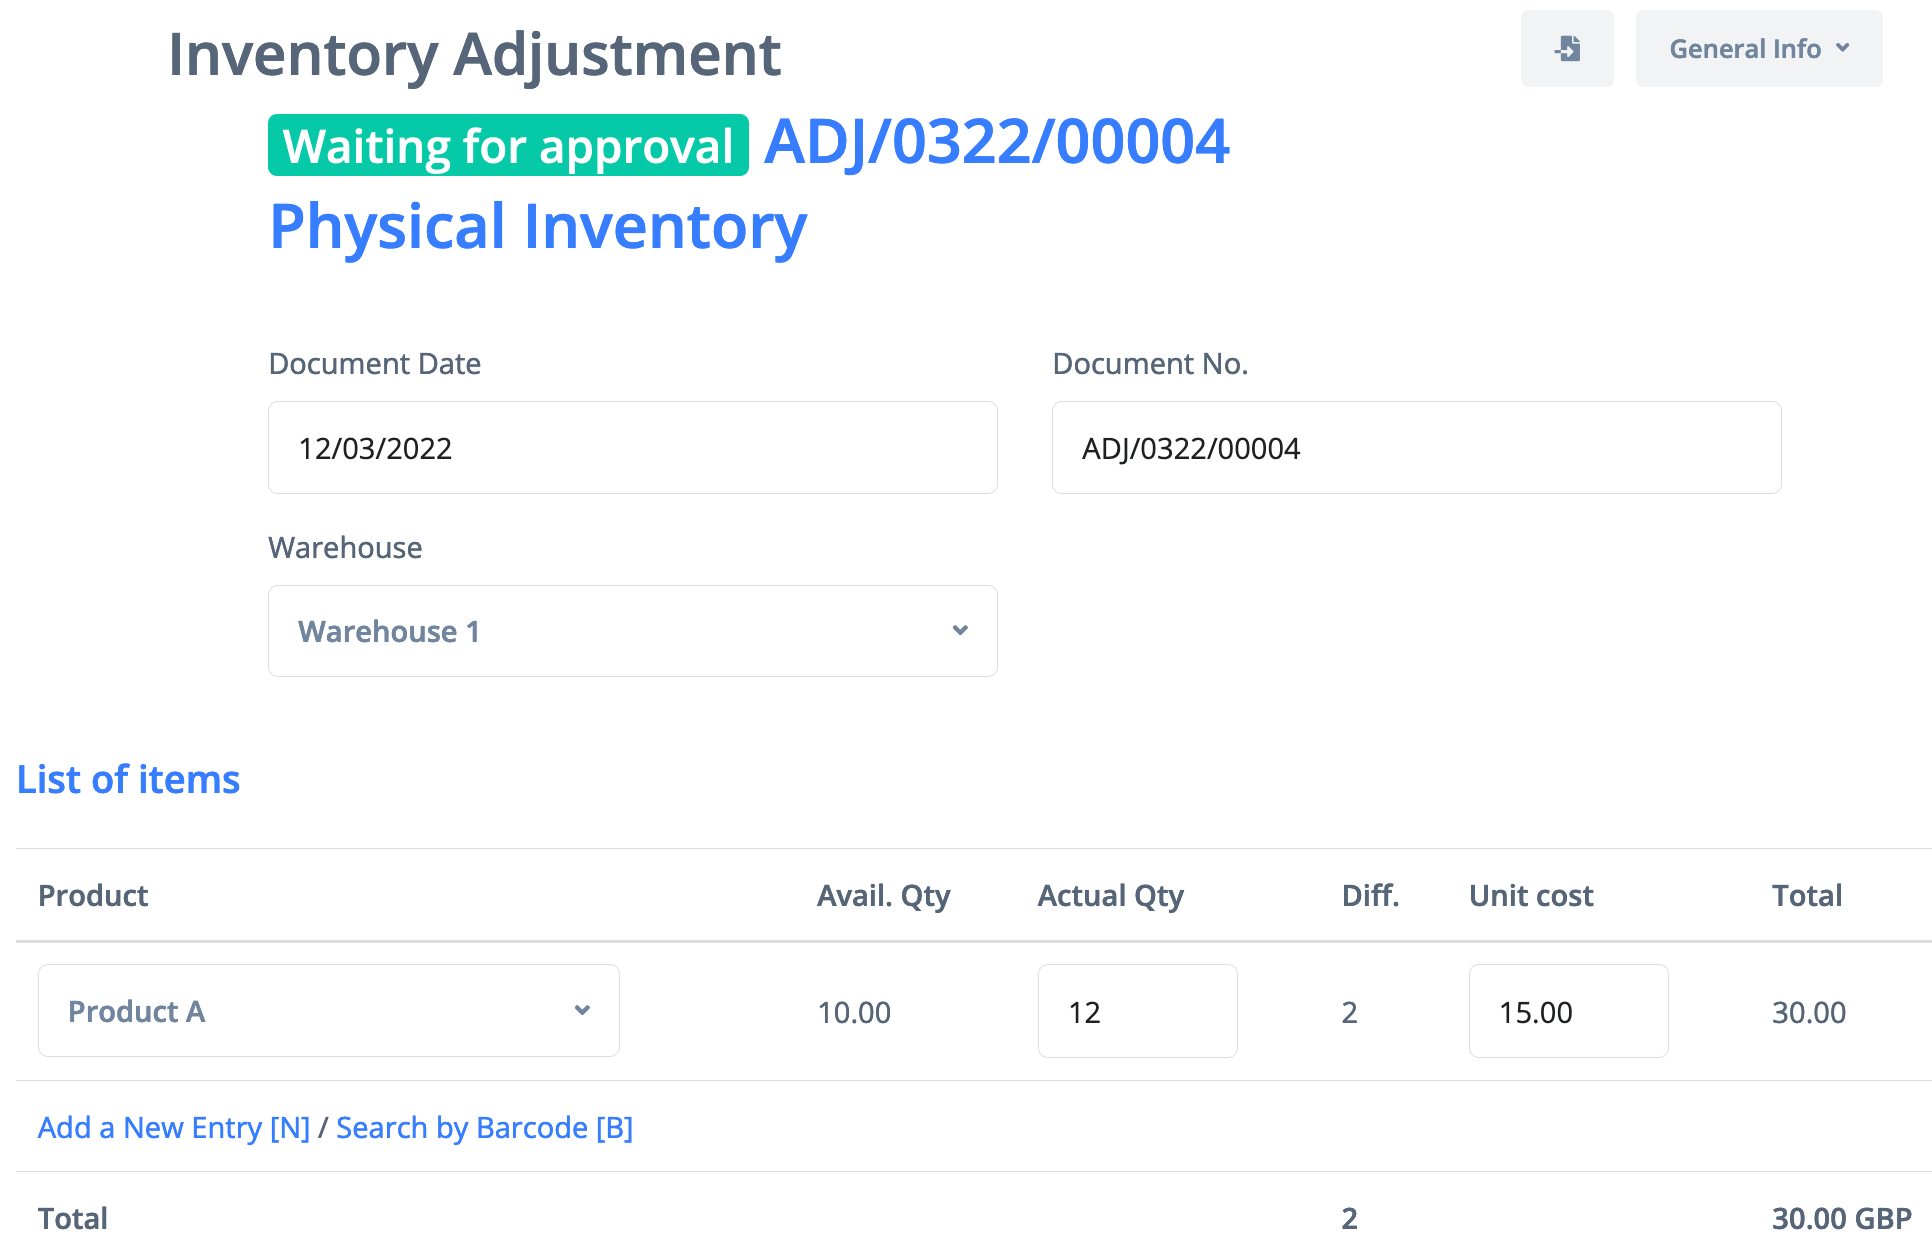
When selecting an item in the “Cost per Unit” field, an actual unit cost will then be prompted. If needed, its value can be edited manually.
To add a new line, press the “N” key on the keyboard or the “Add a New Entry” link on the display. Having completed the stock-taking list, press the “Update” button to save the information.
5) Having checked the entered information, press “Confirm”. The operation will be completed, the inventory balances will be adjusted, and the corresponding journal entries (for changes in inventory value) will also be created.