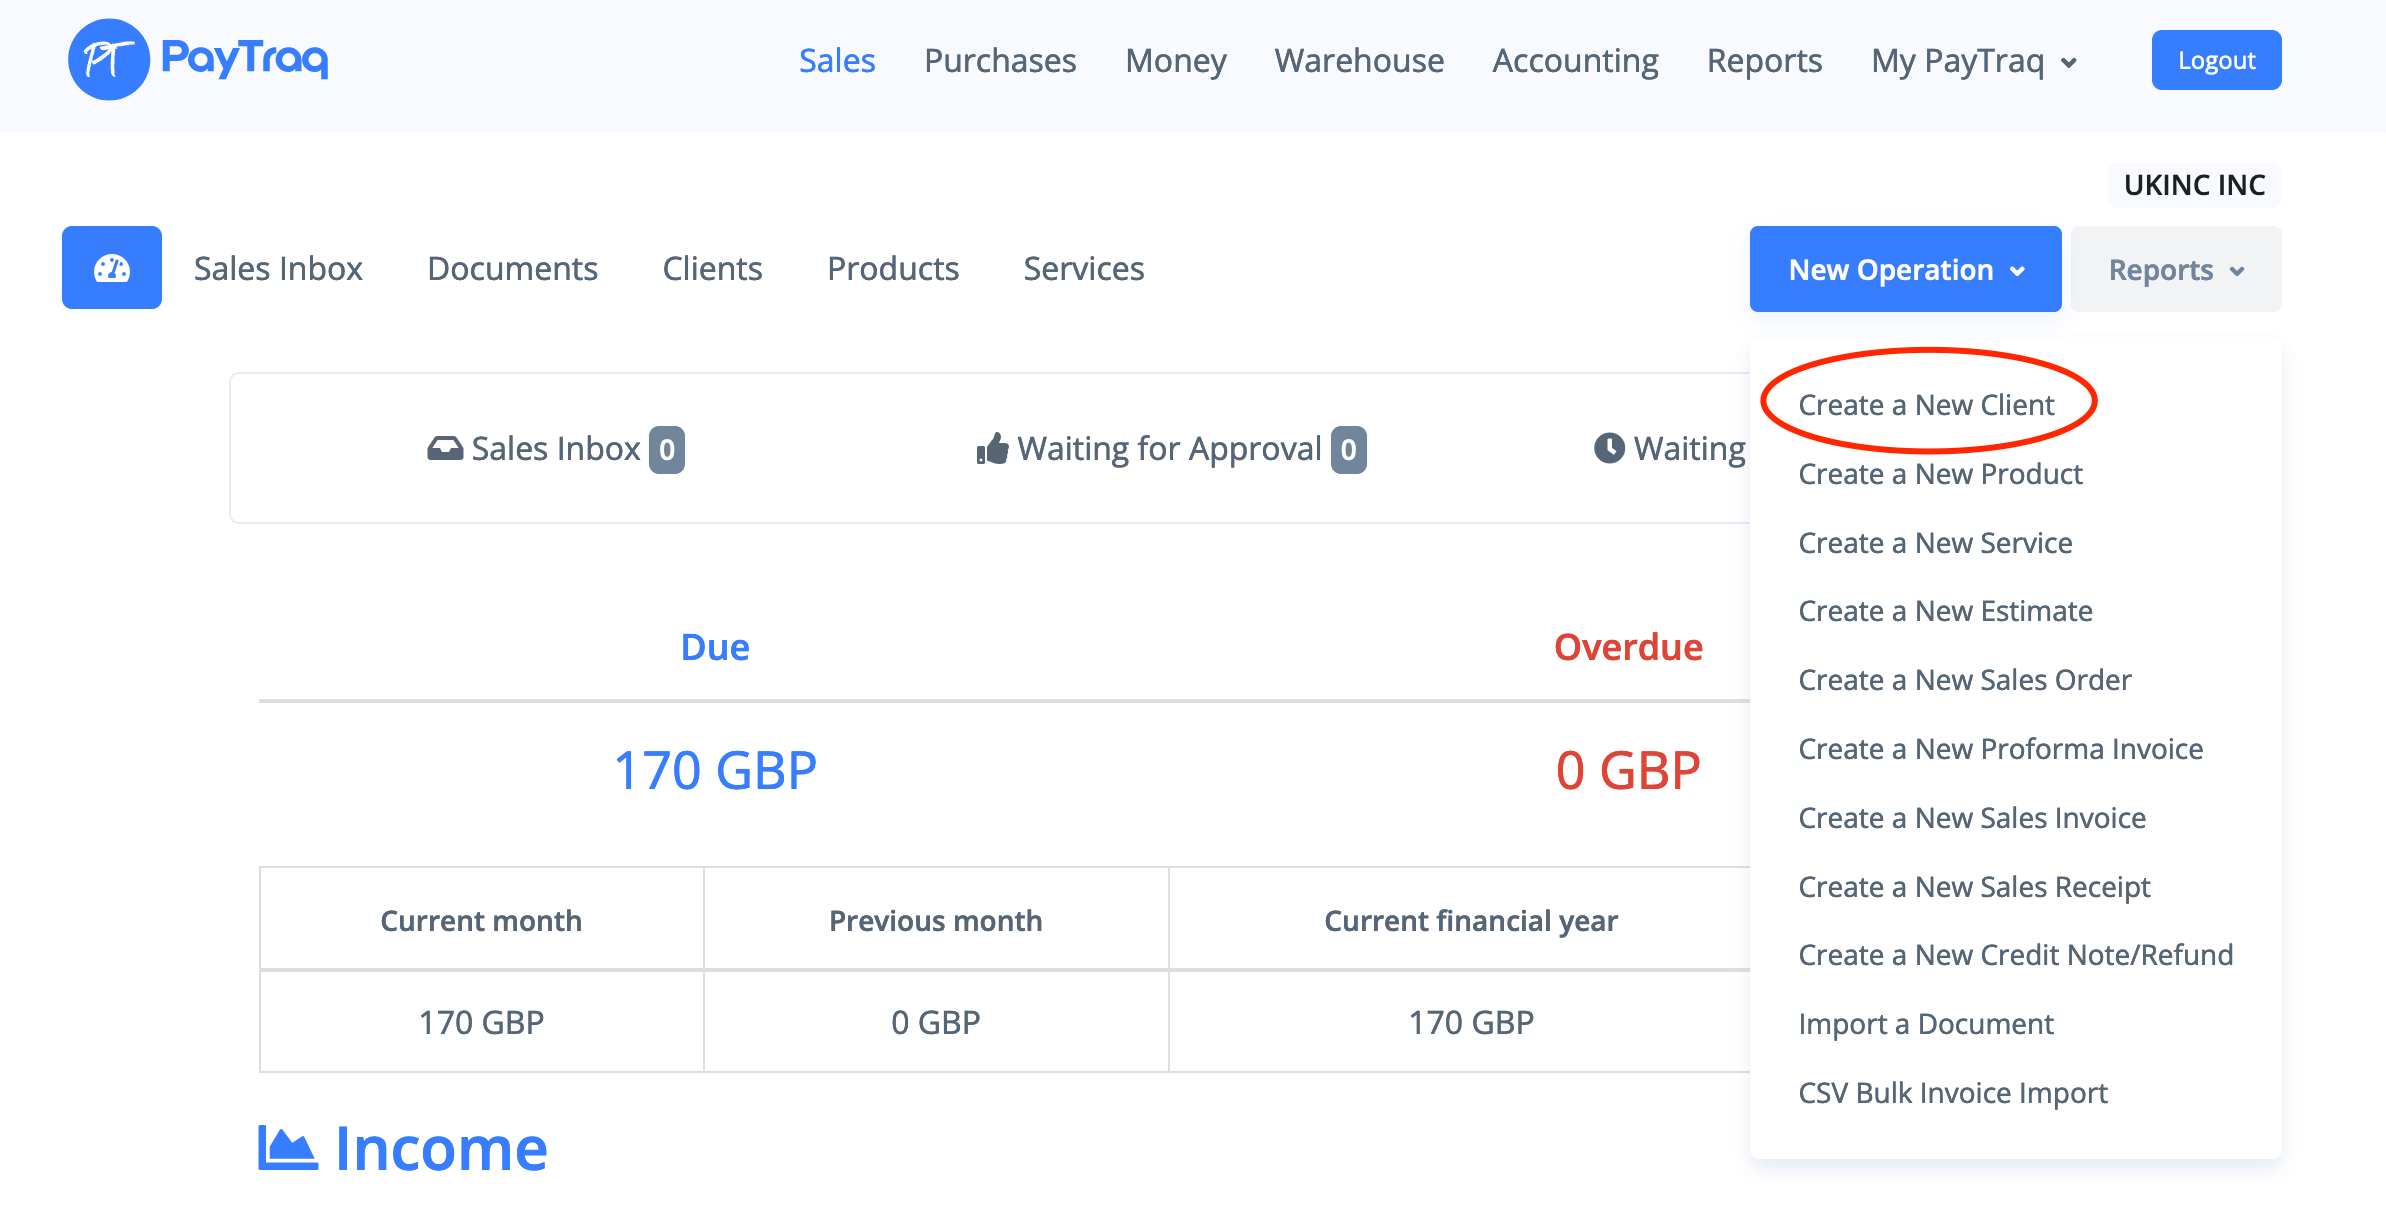
To create a new client you can either choose Create a New Client in the Sales -> New Operation
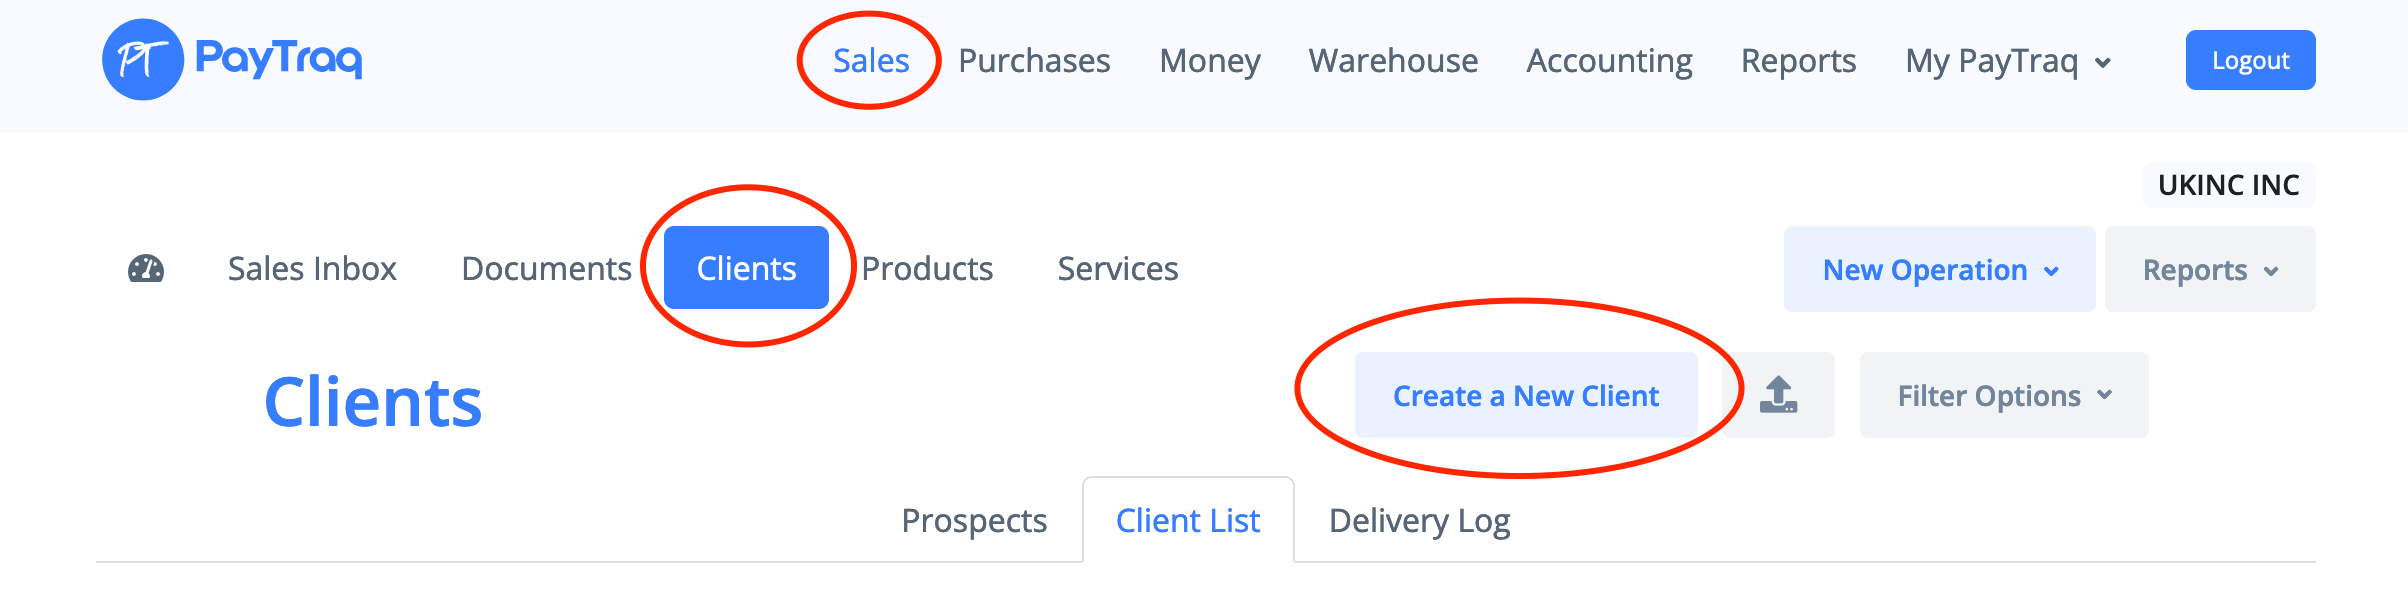
or go to Sales -> Clients and click on the Create a New Client button
In opening window enter new client's basic information – all you need is a name, type (choose between Corporate or Individual) and status (choose from Active, Inactive or Prospective). The rest of the fields are optional.
Push the Continue button to save entered information. New client has been created. Now you can add more information about new client in client's card. For convenience information on a client card is kept in multiple tabs.
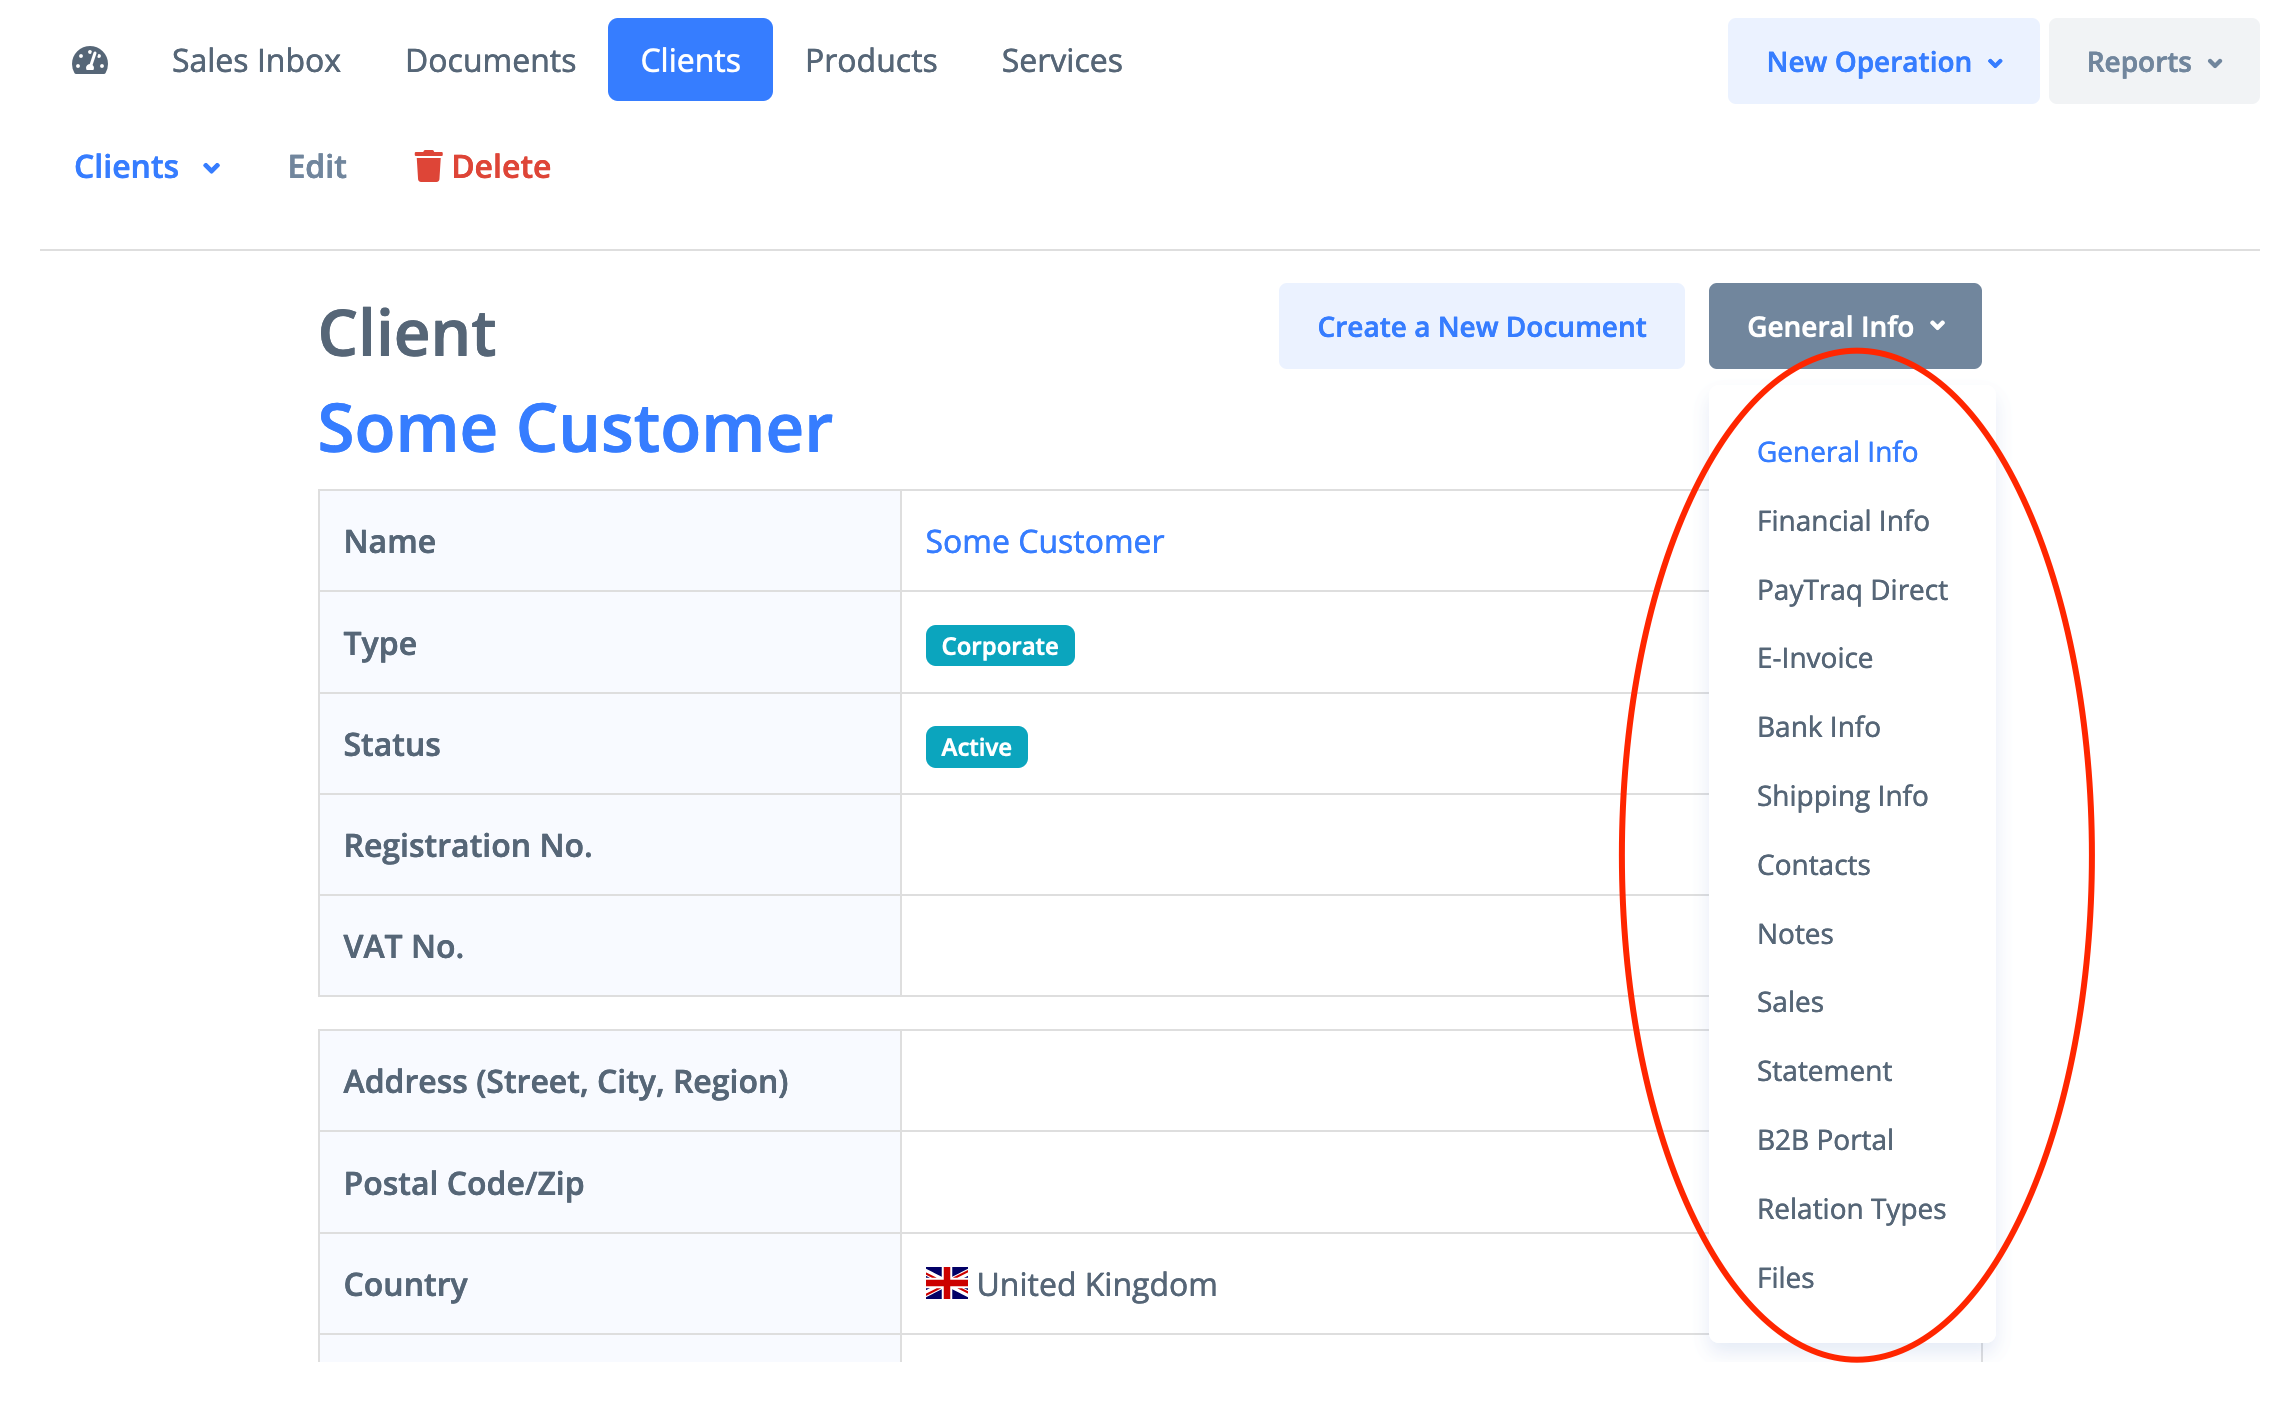
1. General Info:
Press Edit button to enter new information on this tab.
- Enter a client's registration number.
- Enter the VAT number (Taxpayer ID) for new client as an additional reference. The VAT number is used in many European countries as the principal means of identifying and querying customers.
- Enter address and contact details.
- Select a group of clients (if needed).
- In the bottom part of this tab you can also assign tags to the client. Tags help you divide your clients and documents related with them into very specific lists. You can enter multiple tag names, separated by commas.
To save changes, click the Change button.
2. Financial Info:
Press Edit button to enter new information on this tab.
- Enter a contract number if applicable. A contract number may be used for documents in auto-numbering.
- Fill the fields needed with necessary information. The discount, payment term and tax keys will be applied by default to all new document with this client. These values could be changed manually in the document.
- The credit limit will not allow new documents to be recorded, if the customer’s total debt (regardless due dates) exceeds the credit limit. Leave the field blank (0) if you do not want to apply the credit limit to the client.
3. Bank Info:
Press the Create New Entry button to add a new bank details for your client.
Fill in the form with the bank name, bank code and account number, and click the Create button to save the information.
4. Shipping Info:
Press the Create New Entry button to add a new shipping address.
Fill in the form with address information and optionally choose Rate group to automatically calculate the delivery rate for all new invoices (with a type of operation Selling Goods) to this client.
5. Contacts:
Press the Create New Entry button to add a new client's representatives contact information.
Fill in the form with the contact details, and click the button Create to save the information.
6. Relation Types:
Select check box on an additional type of relationship with the client if needed: supplier, employee, bank, tax authority, other.
To save changes, click the Change button.