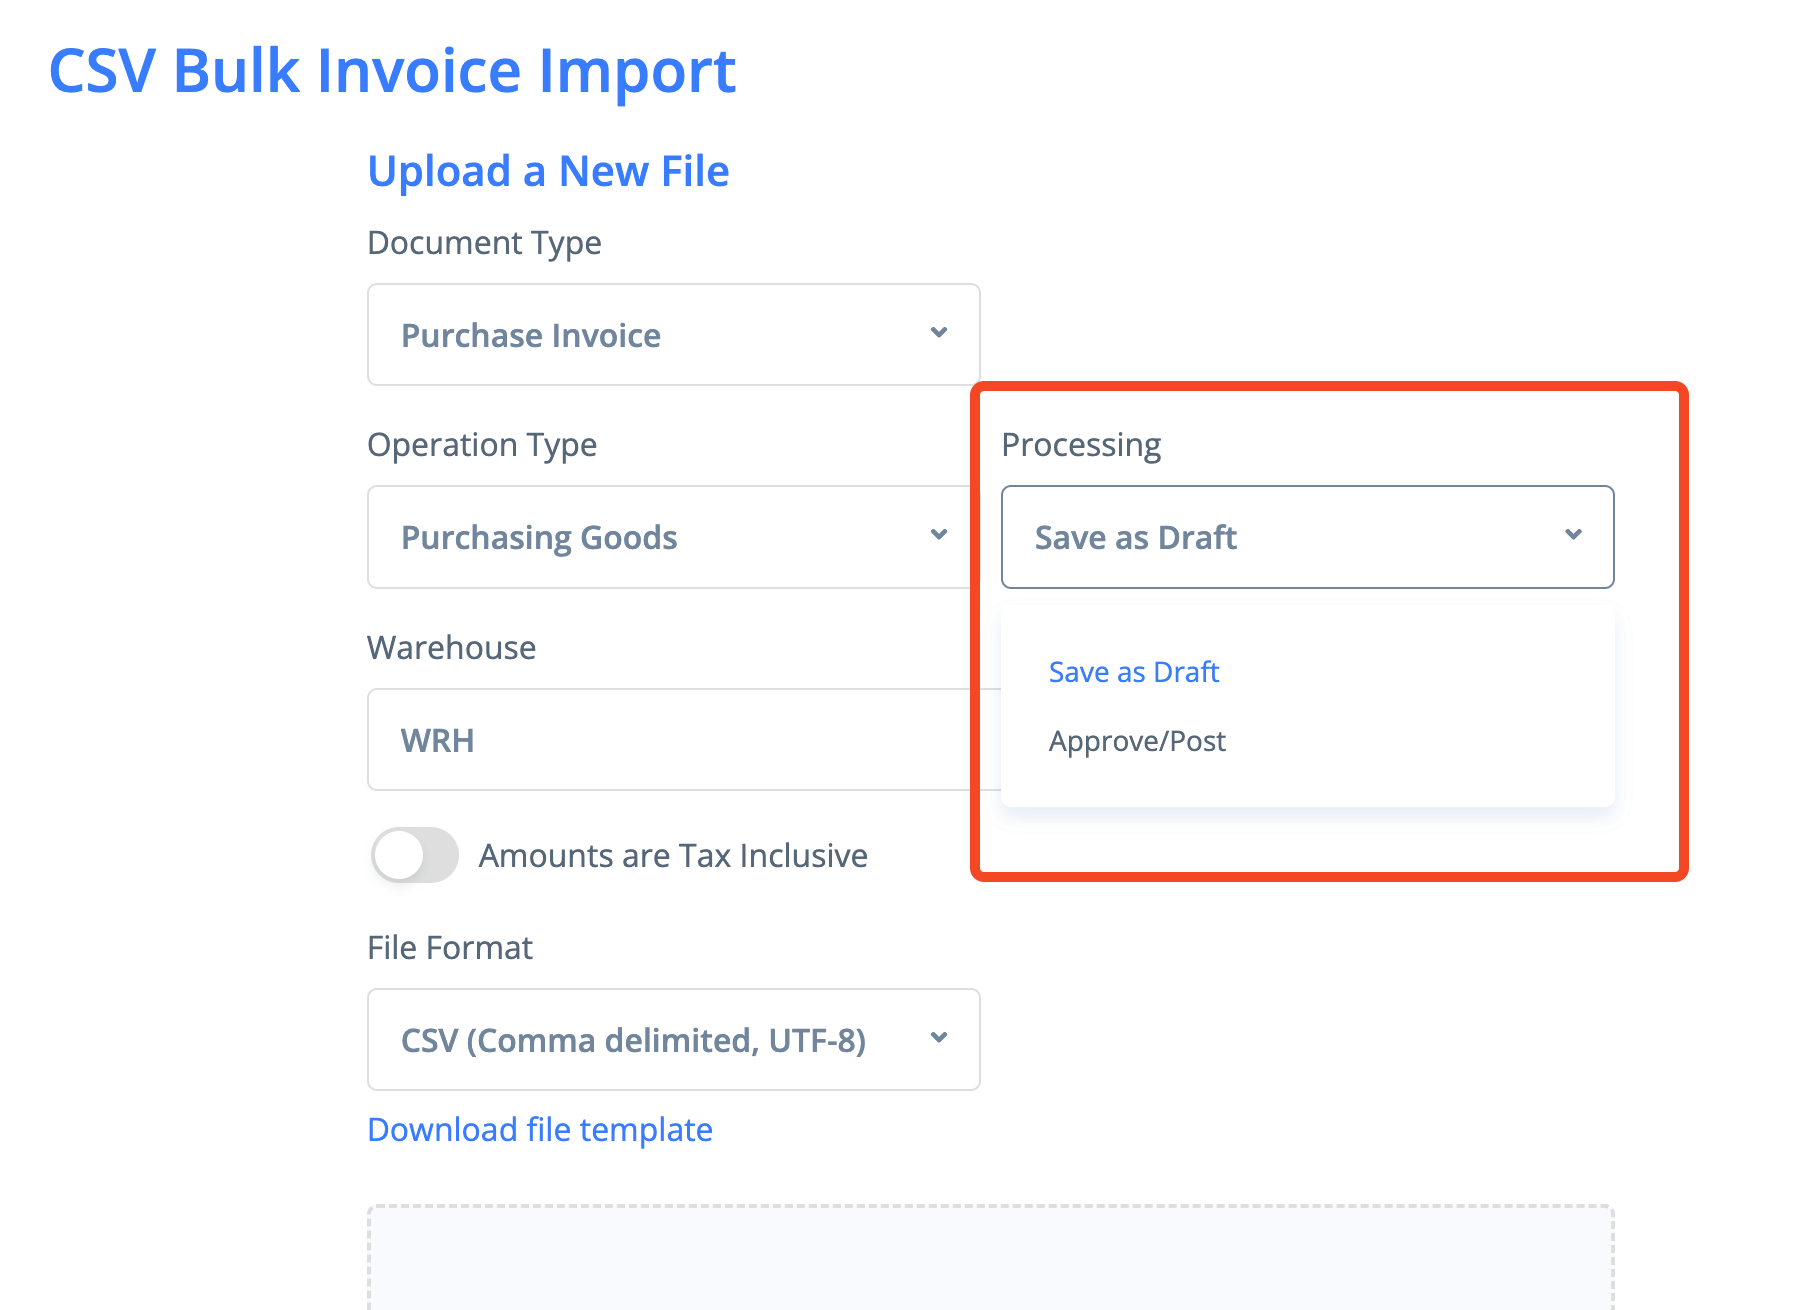
CSV Bulk Invoice Import can be used for automatic uploading and processing of the list of purchase documents from CSV file.
It is possible to select the document type and the operation type before starting the process.
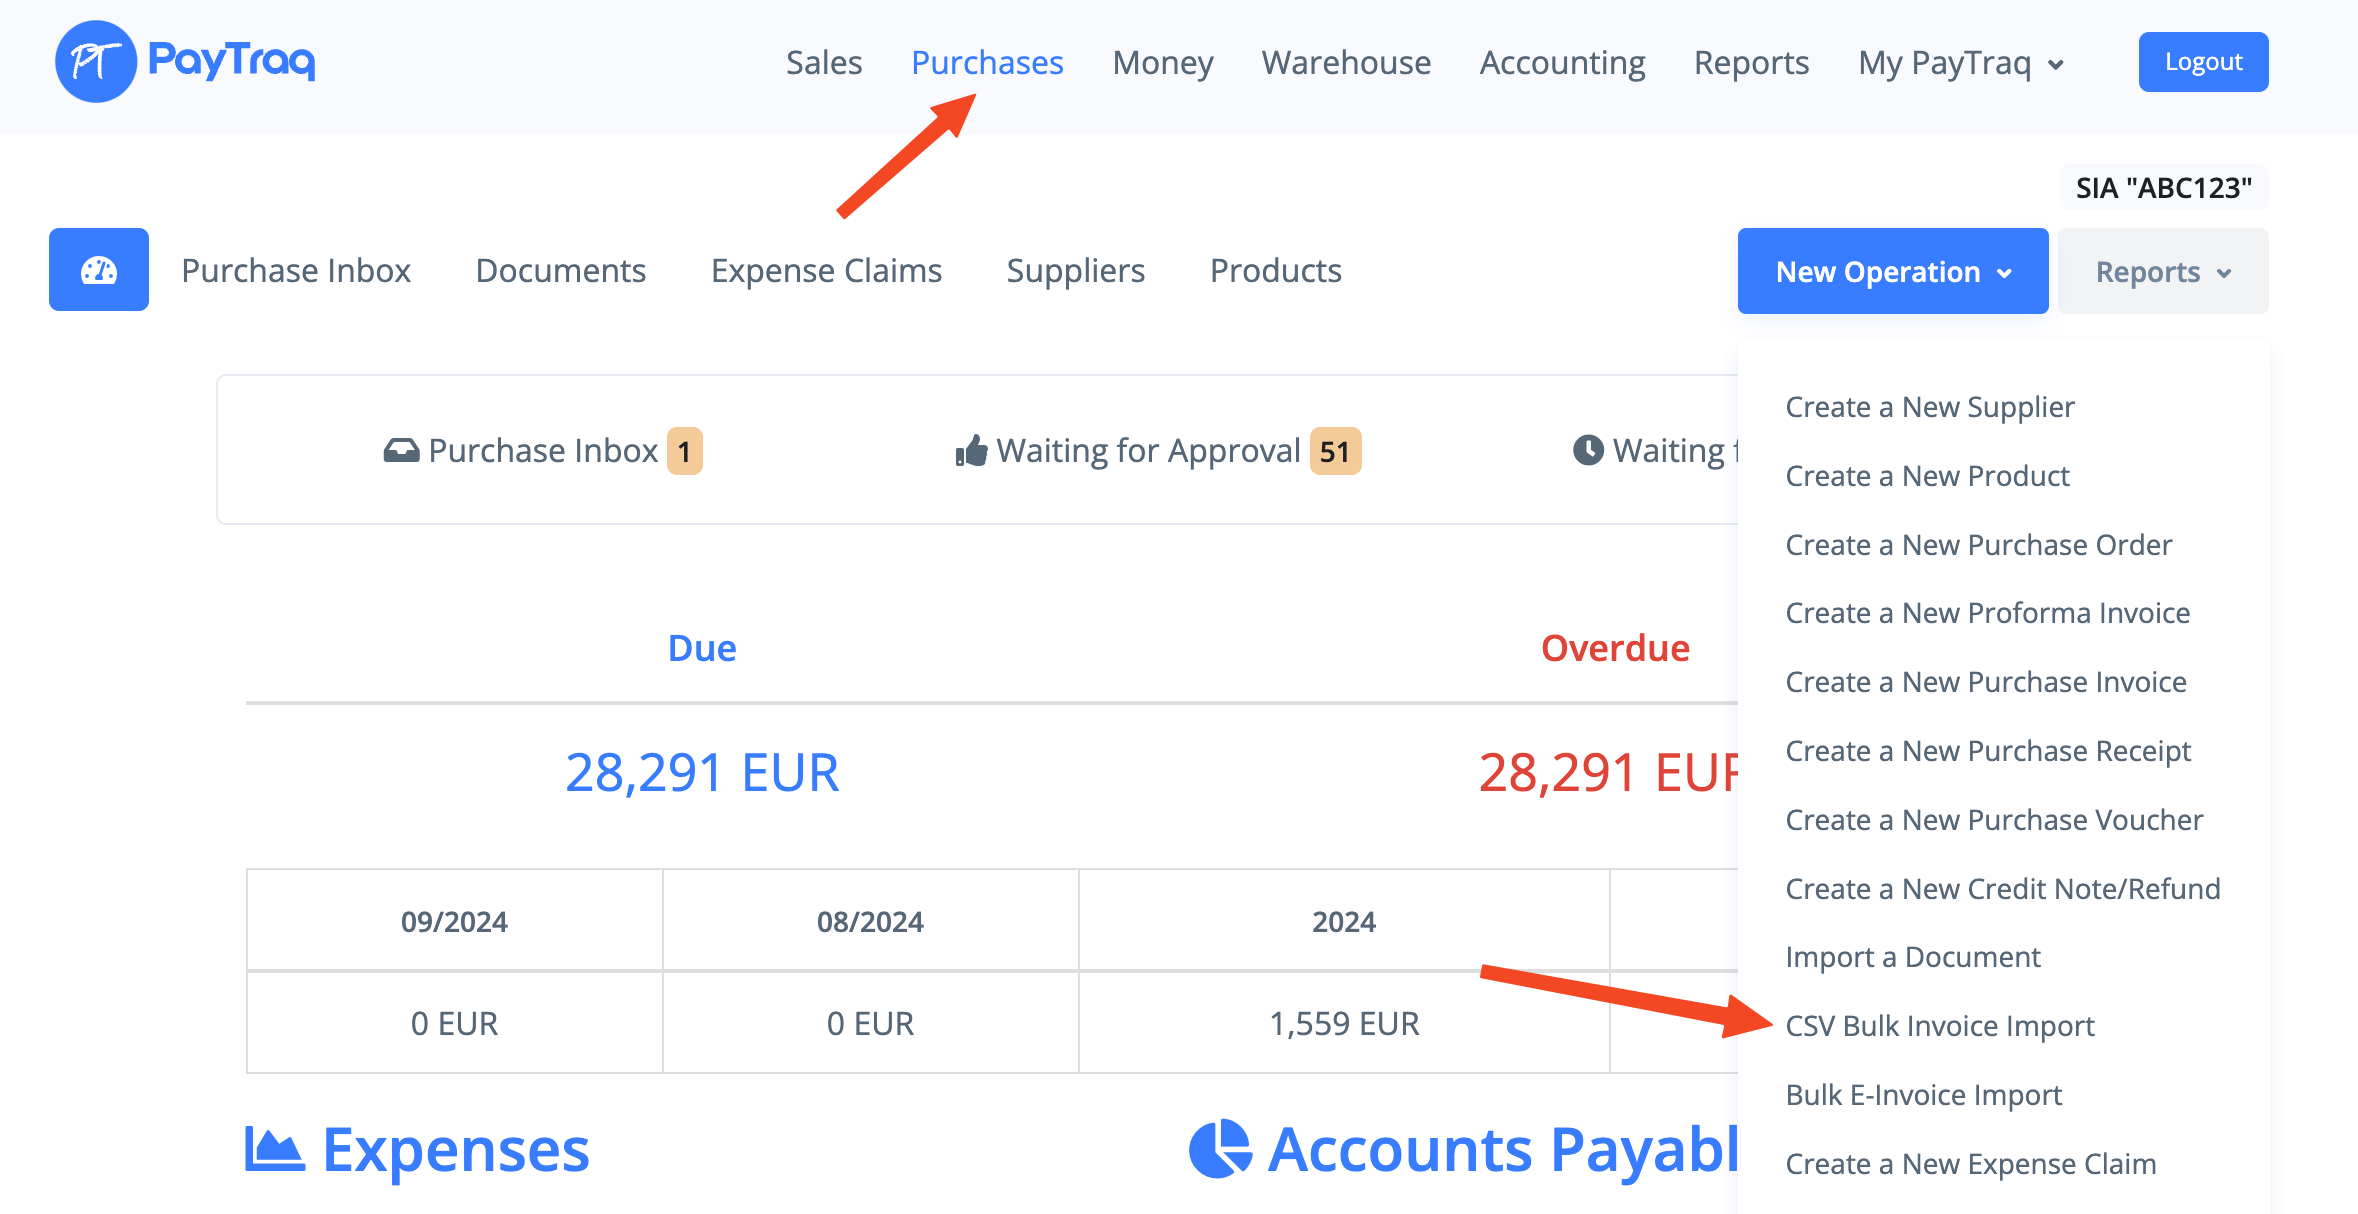
CSV Bulk Invoice Import is available by going to Purchases -> New Operation -> CSV Bulk Invoice Import.
Each of the processed documents can be either saved as draft or posted.
Import runs in the background mode so it's not required to wait while the process will be completed by staying on the same page.
Required fields (columns):
InvoiceDate - document date, if it is left blank the current date will be used
SupplierName - supplier name, if supplier is not found it will be created
ItemName1 - existed product name or item description, if product is not found it will be created
ItemPrice1 - price
All other fields (columns) are optional.
The columns order does not matter but the headers are important and should be the same as in the template.
The required columns are marked with asterisk in the template but this symbol is not required.
The fields to add a line item (N - increment number):
ItemNameN - existed product name or item description;
ItemCodeN - existed product code, if item name is left blank then the item will be looked up by the given code;
ItemQtyN - quantity, if it is left blank then the value 1 will be used;
ItemPriceN - price;
ItemDiscountN - line discount in %;
ItemAccountCodeN - account code, if it is left blank the default code will be used;
ItemTaxKeyN - tax key name or ID, if it is left blank the default tax key will be used;
Up to 25 line items are supported for a document row: ItemName1, ItemName2, ItemName3, ... ItemName25
At least 2 columns should be added for every additional line item (N - increment number):
ItemNameN
ItemPriceN
InvoiceNumber - document number;
The fields to create a new supplier:
SupplierName - supplier name
IsCompany - supplier type, the value should be 1 or true to set the type to Corporate and 0 or false to set the type to Individual
SupplierRegNumber - registration number
SupplierVatNumber - VAT number
SupplierAddress - address (street, city)
SupplierZip - zip code
SupplierCountry - 2-Letter country code (ISO 3166-1 alpha-2)
SupplierEmail - email address
The existed shipping address will be looked up by the following fields (for Credit Notes only):
ShippingTo
ShippingAddress
The fields to create a new shipping address (for Credit Notes only):
ShippingTo - recipient name
ShippingAddress - address (street, city)
ShippingZip - zip code
ShippingCountry - 2-Letter country code (ISO 3166-1 alpha-2)
ShipperName - shipper name (for Credit Notes only)
The fields to add a shipping charge:
ShippingCharge - shipping charge;
ShippingChargeAccountCode - account code, if it is left blank the default code will be used;
ShippingChargeTaxKey - tax key name or ID, if it is left blank the default tax key will be used;
PaymentMethod - payment method, can contain one of the following values (If it is left blank the default value will be used):
0 - Not Defined
1 - Bank
2 - Cash
3 - Card
4 - Prepayment
5 - Offsetting
6 - Factoring
Comment - comment;
The fields to add a new payment to the posted document (N - increment number):
MoneyAccountNameN - money account name, the currency of the account should be the same as in the document;
PaymentAmountN - payment amount;
Up to 3 payment types are supported for a document row: MoneyAccountName1, MoneyAccountName2, MoneyAccountName3
Other fields:
Tags - tags (multiple tags can be added, separated by commas)
ProjectName - project name