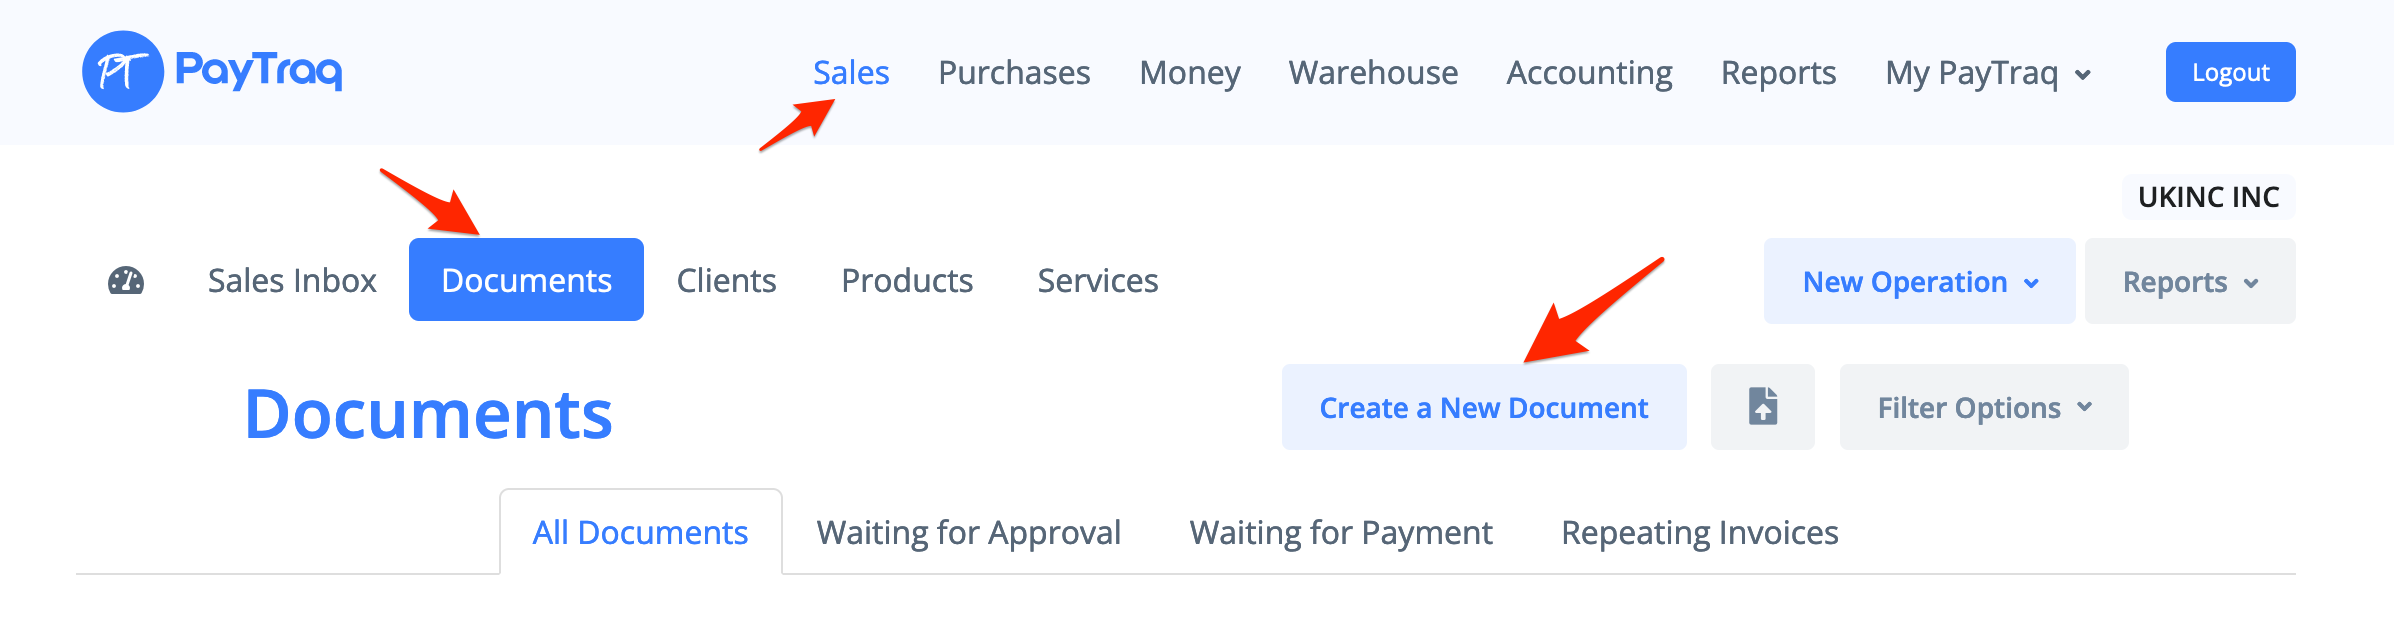
1. Go to Sales -> Documents and click "Create a New Document" button.
2. Choose one of the operation types: Selling Goods, Selling Services or Other Income
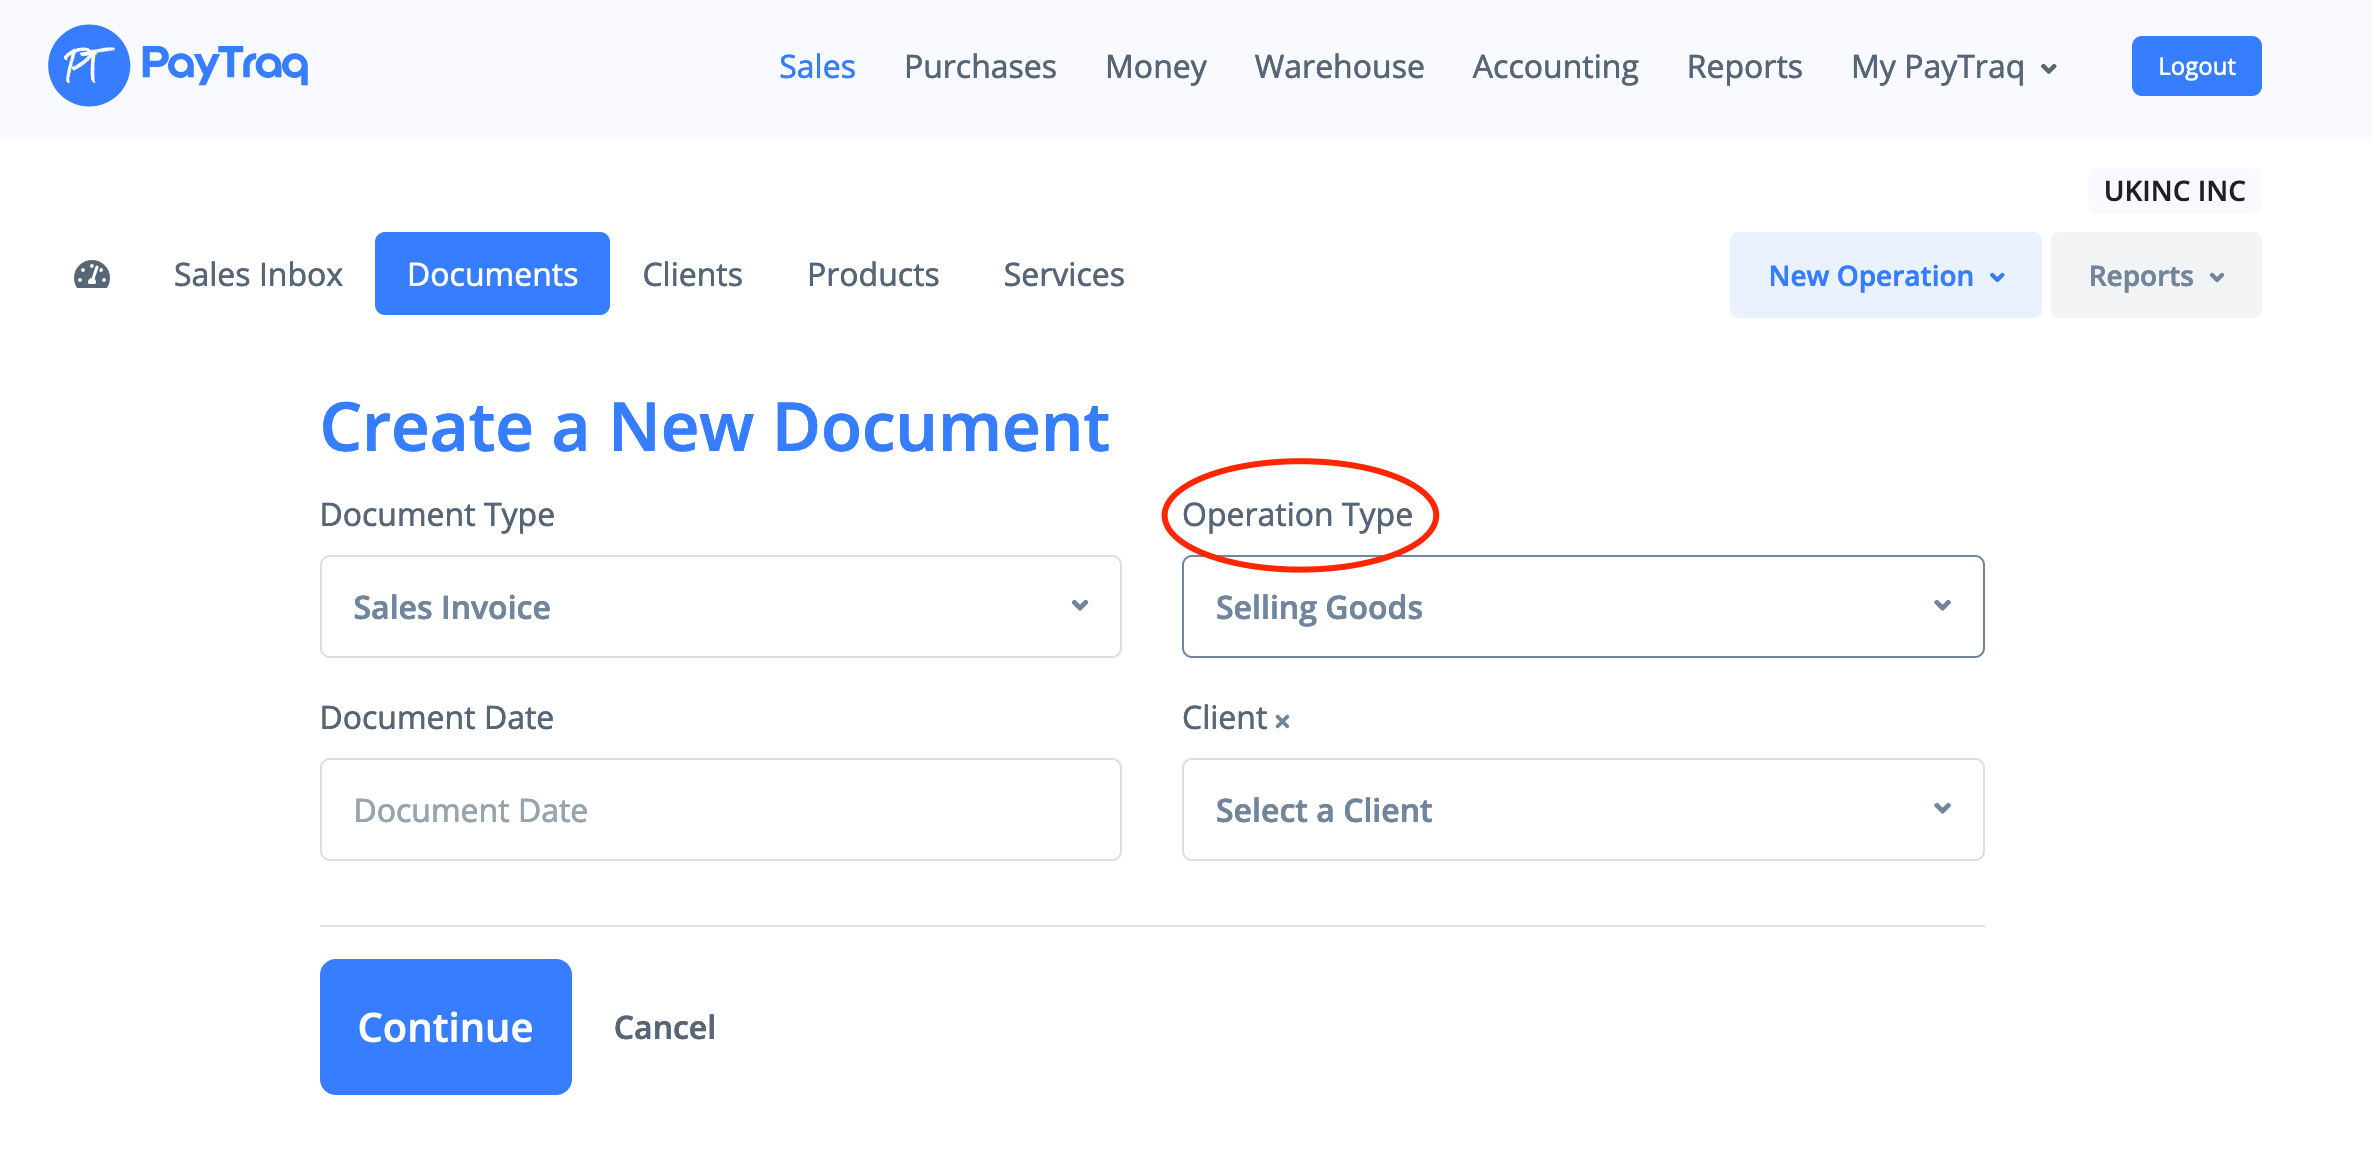
PayTraq supports different types of Sales, here is a brief explanation:
Selling Goods – this invoice type is for selling goods (and related items) registered (or supposed to be registered) in the program.
Selling Services – this invoice type is for selling services registered (or supposed to be registered) in the program.
Other Income – is a free-form of an invoice that allows adding products and services that are not registered in the program.
The document form depends on operation type.
3. Choose a document date (this defaults to today's date).
4. Choose a client.
Start typing here the name of the customer the invoice is for and then select one from the results. If the client is not on the list, then fill up a "Client" field with a name and a new client will be created (you can complete all this client’s details later).
5. Document Number.
The automatically generated invoice number is the next one in the sequence you have set up (My Company -> Settings -> Accounting -> Document Numbering). You can change the invoice number but it must be unique. The automatic numbering sequence will take this new invoice number into account when it generates the next number for the next new invoice generated (if the new number belongs in the sequence). If an invoice is deleted or voided the invoice number stays with it however you can re-use the number of a deleted invoice.
6. Payment terms.
This will be the default payment term for your organization or this client if you've set one up ( Sales -> Clients -> Financial Info tab). Or you can override a default payment terms, in this case choose one of available options:
Due day
EOM+ (end of the month plus)
Cash on delivery
Open date of payment
7. Use an "Amounts are Tax Inclusive" check box if you suppose to enter prices that are tax included.
8. Add line items to your invoice
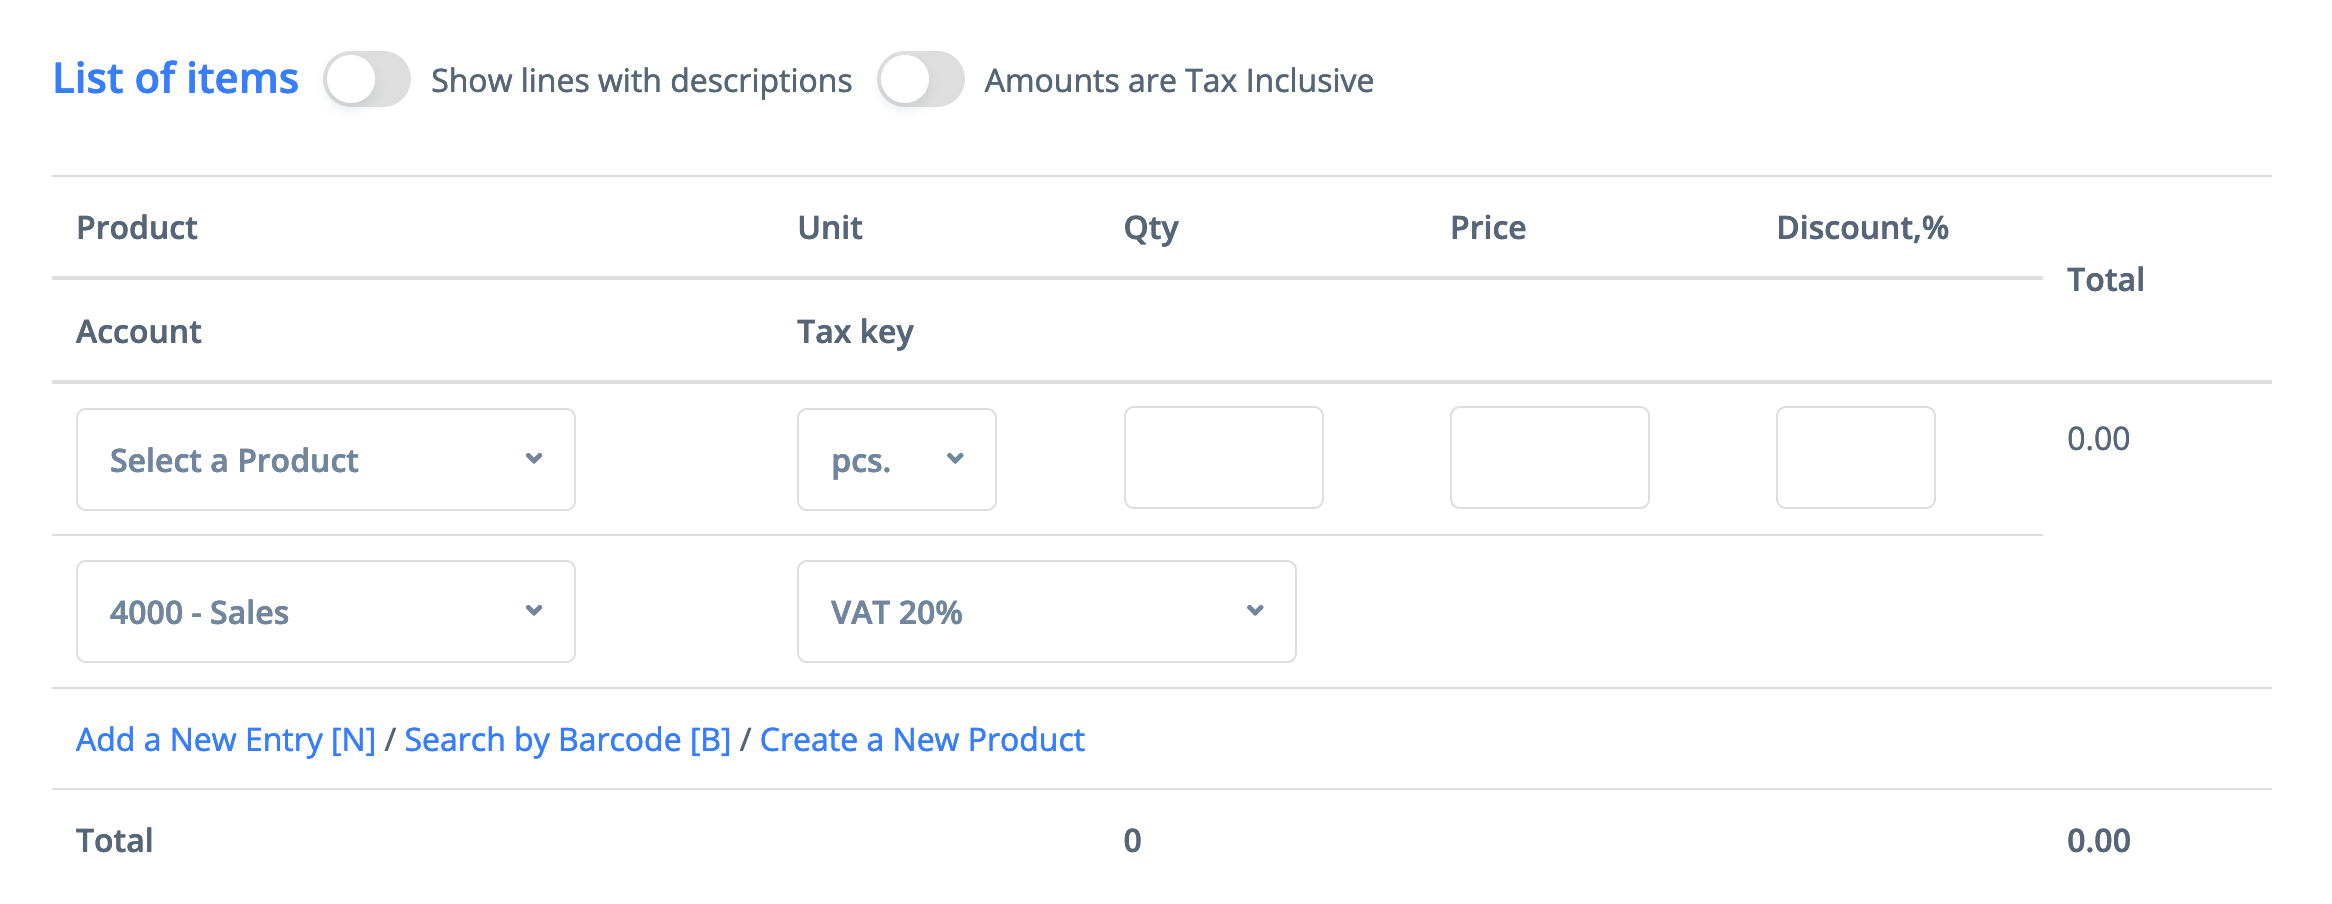
Add a product, service, or description (in a free-form for Other Income type).
Enter or edit the quantity for the line item (you can enter positive or negative). A negative product quantity generates return shipment.
Enter the price for the line item. You can apply a discount percentage to the invoice line's unit price.
Choose a general ledger account and a tax key for this invoice line if they differ from the default ones.
The overall total amount displayed for the invoice will take into account all line items entered above and the tax keys chosen.
If the product or service is not registered in the program you can add them though "Create a new product" link.
Click "Add a New Entry" link or N button on your keyboard to create next entry.
9. Total Discount
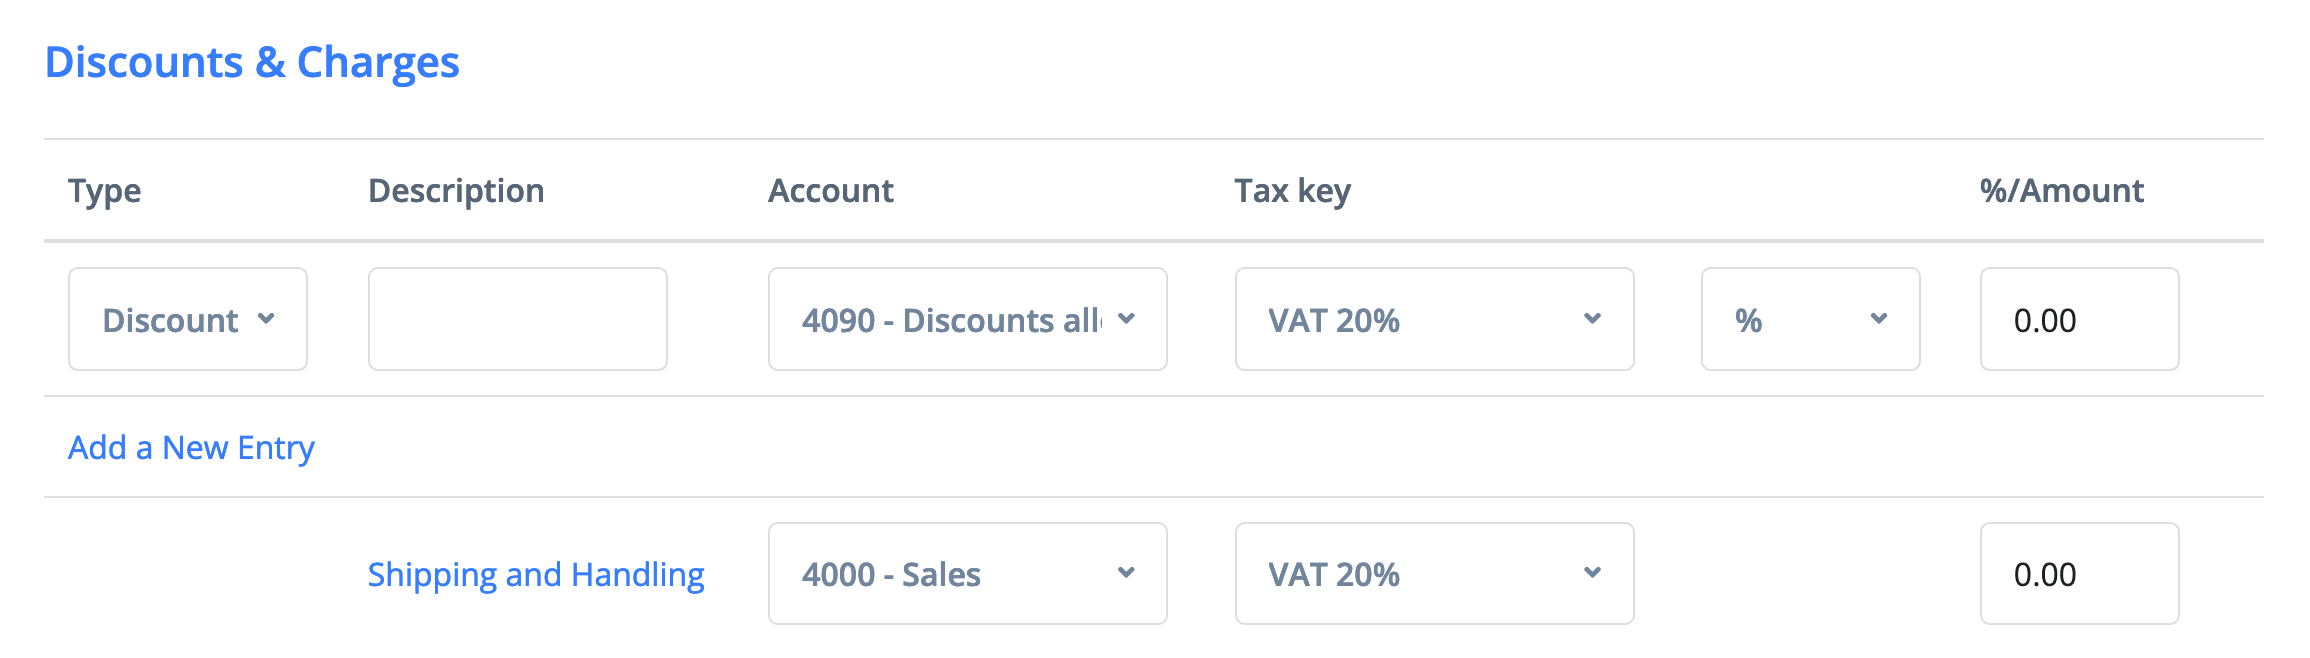
Total discount or additional charge can be set in sum or per cent of the invoice lines sum. You can add more than one total discount line to invoice by clicking " Add new entry" link to add next.
10. Shipping and Handling
Add applicable shipping cost to the invoice. Click " Shipping and Handling" to get the appropriate shipping rate (you can predefine shipping rates in My Company -> Settings -> Shipping).
11. Choose Tax basis
This will be the default one that is defined in your company settings. In case of need you can change it. Tax basis affects how tax amount is recorded in your accounts.
12. Click the "Update" button to save entered information.
Check the invoice and push the "Post" button. New sales invoice and related journal entries will be created. If invoice contains any stockable products a corresponding outgoing shipment will be created as well.